...
| Table of Contents |
|---|
Installation Procedure
- Download the Merging Audio Device driver Installer for Windows ADD LINK
Launch the Merging Audio Device driver Installer file.
The installer may warn of pending requirements (Bonjour & Microsoft Redistributable C++)
Accept and proceed with these installations.
Accept the software license agreement.
When the installation is finished, restart the computer, as prompted by the installer.
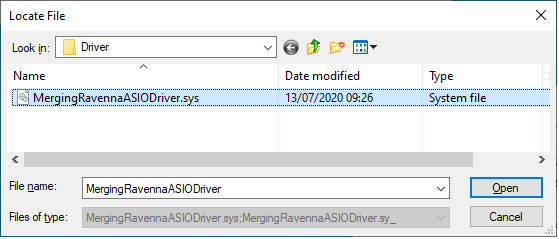
Expand title MergingRavennaASIOdriver.sys location message during installation. If during the installation of a new Merging RAVENNA ASIO driver / Merging Audio Device driver, the installer ask you to provide the location of MergingRavennaAsioDriver.sys
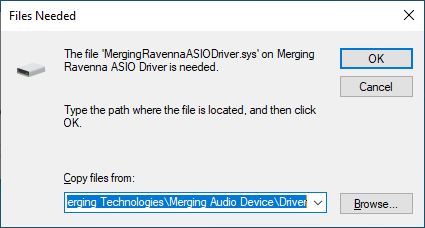
The Merging RAVENNA ASIO driver / Merging Audio Device driver has been updated, but as Windows keeps all driver versions in a hidden vault, you have to confirm the driver location.
- Click on Browse
- Windows should automatically propose the correct file path, but if not, please manually browse to C:\Program Files\Merging Technologies\Merging RAVENNA ASIO Driver\Driver
- Select the MergingRavennaAsioDriver.sys and click on Open.
Then click on OK to close the message window.
Plug the Ethernet cable from the MERGING+NADAC device / network switch on a standard Network Adapter on your computer, and turn on the device.
Note : For better performances, Merging recommends to use a separate adapter.
When the PC has rebooted open the Merging Audio Device Panel.
Windows Start Menu - All Programs > Merging Technologies > Merging Audio Device Panel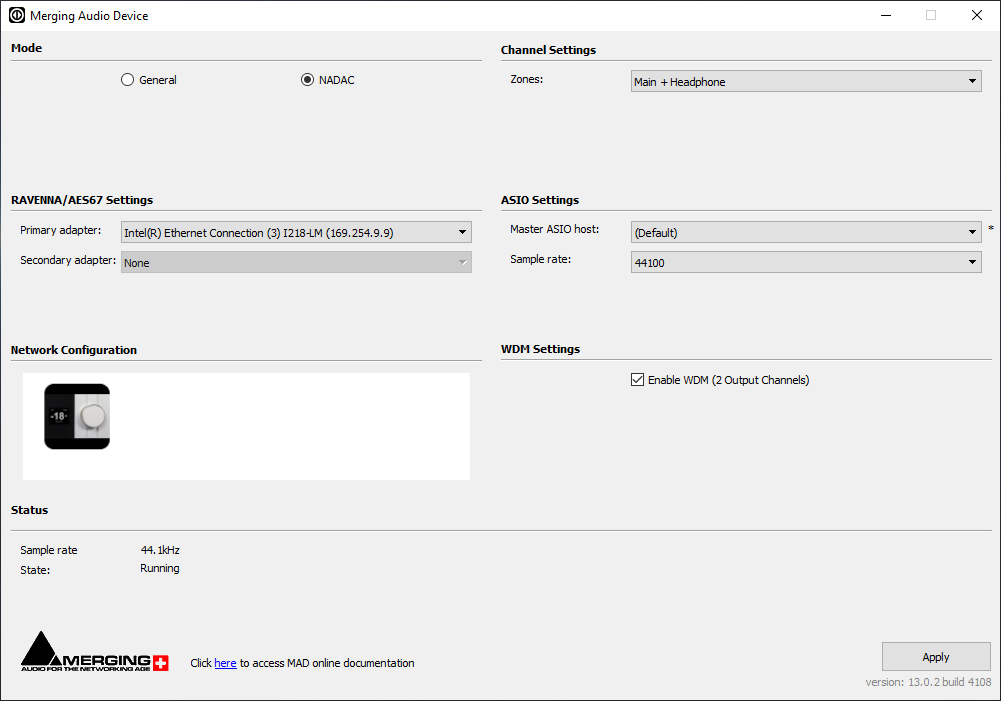
Note : Until both the driver and NADAC are properly configured, the panel Sample rate and State will show error (ASIO Clock missing).Switch to NADAC Mode and click on Apply

If you have several Ethernet Adapter, please select the one your MERGING+ device is connected to (Primary adapter).
Click on Apply.
Set the Zones setting according to your needs, and click on Apply.

Main : 1 Zone
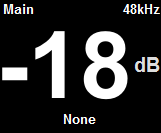
Main + Headphone : 2 separate zones.Now that the driver is configured, please go to the MERGING+NADAC OLED display.
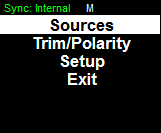
- Long Push the MERGING+NADAC Rotary button
- Select Sources Menu
- Select the Source : your computer name should be displayed, select it.
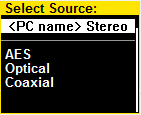
The Source will then be selected.
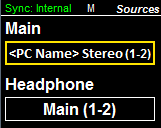
Once selected, the Merging Audio Device panel Sample rate and State will no longer show an error message.
Note: If the source is written in Red this would indicate that the Source is not valid.
Please verify your connections and configuration in such cases, and reboot your computer.
If it still do not work please refer to the NADAC Troubleshooting section.Now you can start your Media Player application and configure it to use the Merging Audio Device driver.
You may refer to our specific applications guides.
...