2. Connecting Anubis using ANEMAN to Monitor a Source
Objective: Running Merging's RAVENNA/AES67 drivers and using ANEMAN in order to make connections and monitor your DAW playout.
Prequisites
Merging Audio Device driver (previously Merging Ravenna ASIO) (Windows) or VAD CoreAudio driver (Mac) is installed and configured (refer to the Drivers Installation procedure)
- ANEMAN installed (using version 1.1.7 beta 2 and higher is mandatory)
Anubis connected to your computer network adapter
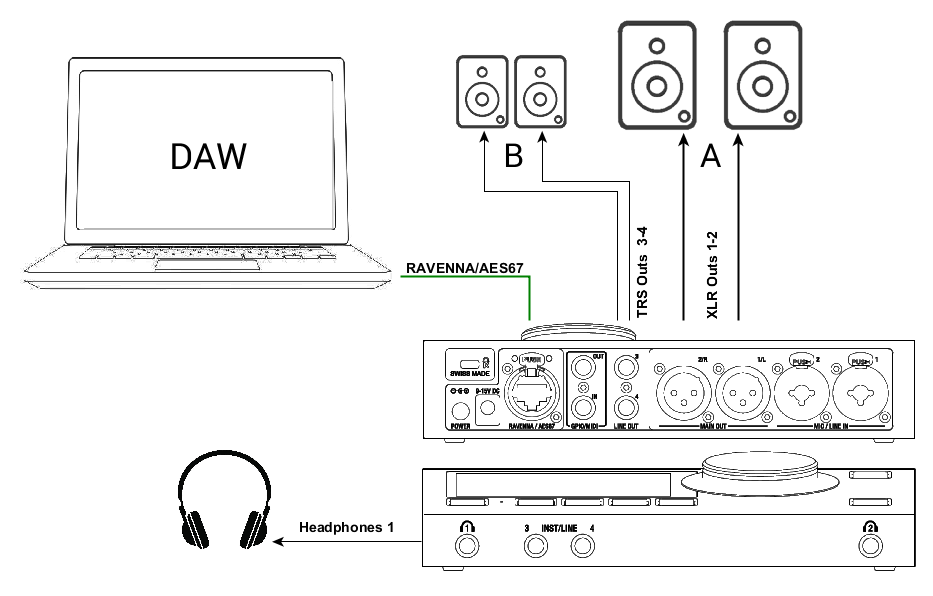
Active Monitors (or Power Amp) connected to the Anubis physical Outputs XLR 1 and 2.
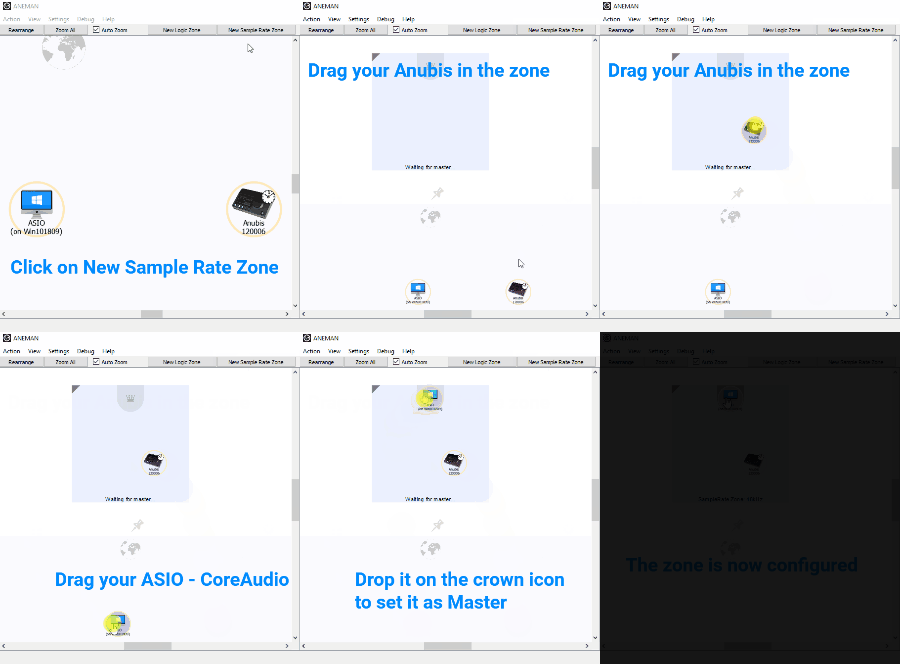
Create a Sampling Rate zone in ANEMAN
- Start your DAW and set it to use the Merging Audio Device driver (previously Merging Ravenna ASIO driver) (Windows) or CoreAudio VAD driver (Mac)
- Start the ANEMAN application.
Your Anubis and the ASIO (Windows) / CoreAudio (Mac) will be automatically discovered. - Click on the New Sample Rate Zone button.
This will create a dedicated sampling rate zone, allowing each device in that zone to automatically follow the zone Master. - Drag your Anubis device in the zone.
- Drag your ASIO or CoreAudio device in the zone, but this time drop it on the top crown slot.
The crown will turn from grey to green, to show that the device has been set as the Sampling Rate Master.
Your Anubis sampling rate will automatically follow sampling rate changes from your DAW.
Connect the audio between your DAW and Anubis
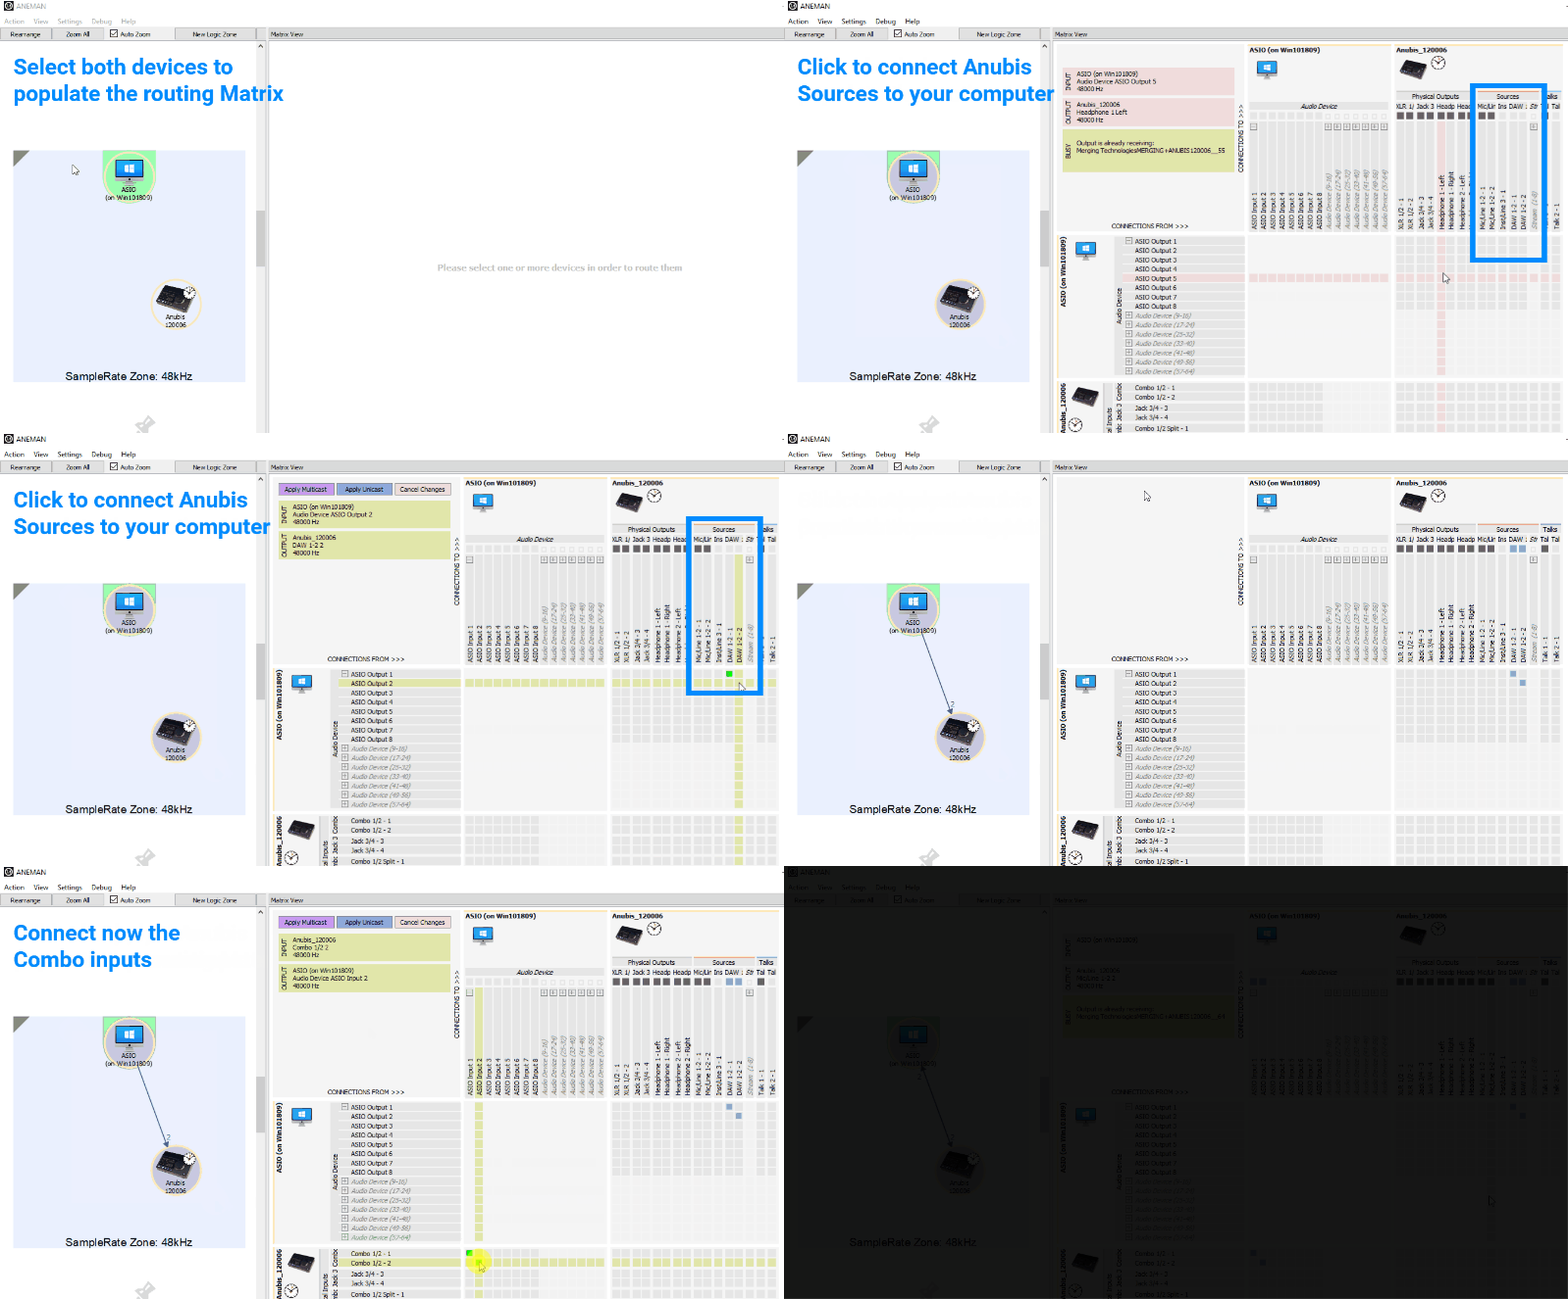
- With the mouse, draw a square to select both the ASIO/CoreAudio and Anubis.
This will populate the Matrix view on the right side.
On the Anubis, you can see there are different sections, physical inputs-outputs and Sources.
We are going to connect your DAW on those Sources to take advantage of the Anubis Monitoring engine.
If you connect directly to the physical outputs, you won't be able to control the volume, Trim, mute ... with Anubis knob ! - Click in the Matrix to connect the ASIO / CoreAudio outputs 1 and 2 on the Anubis Source DAW 1-2.
At first the nodes will show green, to indicate that the connection are ready to be made. - Click on the Apply Multicast button or Apply Unicast button.
Unicast: from one source to one destination i.e. One-to-One (Blue connections)
Multicast: from one source to multiple destinations stating an interest in receiving the traffic i.e. One-to-Many (Purple connections)
Aneman will connect your DAW output on the Anubis, the connections in the Matrix will change their color to show the connection status. - In order to have Inputs available for your DAW. This time on the ASIO / CoreAudio inputs 1 and 2 to the Anubis Inputs you want to use, in this example we connect the Mic/Line Combo 1/2 inputs located at the back of your Anubis.
Don't forget to click on the Apply Multicast or Unicast button.
macOS users will only see the connection completely establish once a DAW playback is engaged
Select the Source to Monitor
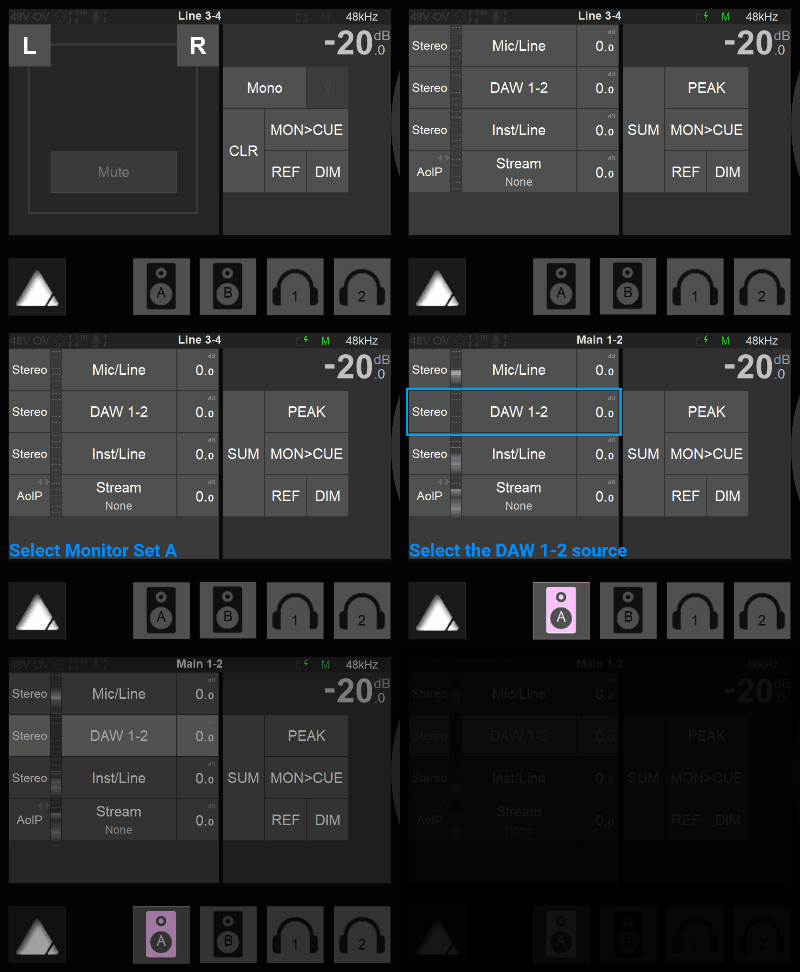
On the Anubis device, browse to the Source page in order to select which source you will monitor.
(Press the Merging logo button to cycle through the pages)- Select the Monitor Set A (press the Speaker A button).
- In the available source, select the DAW 1-2 Source to Monitor it.
You are now listening your DAW output.
Note: If you want to monitor the Direct Mic/Line inputs feed instead of the DAW Mic/Line returns signal, enable the SUM option, this will allow you to Monitor multiple Sources, then select Mic/Line in this case.


