MIDI INTERFACE SETUP.
SetUps
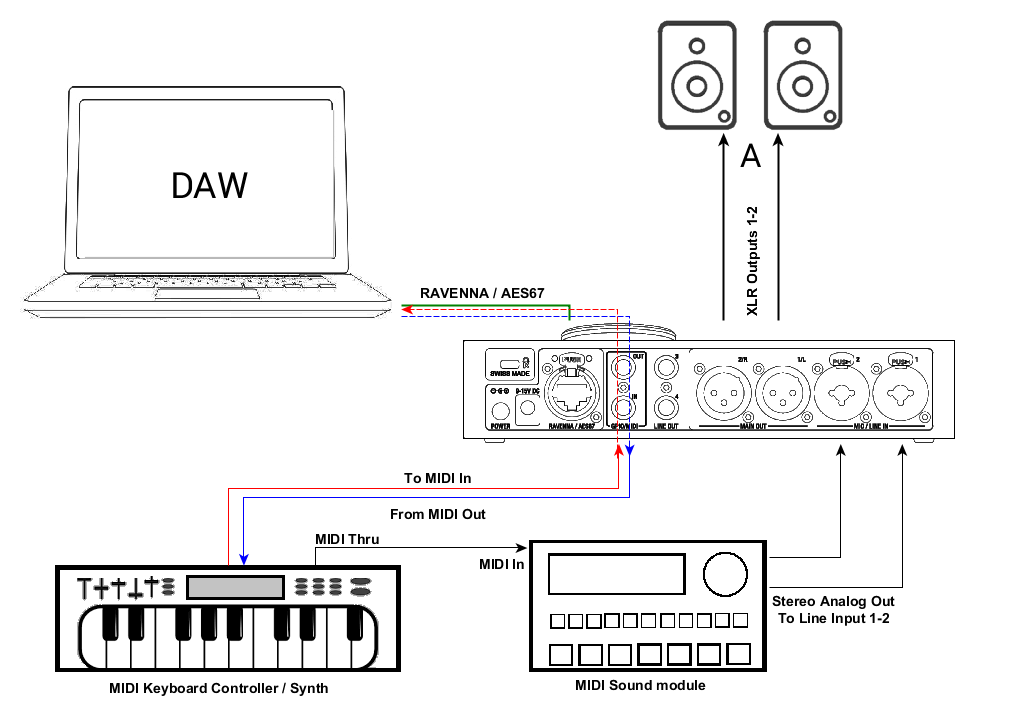
Use Anubis MIDI I/O with your DAW.
Connect a Keyboard MIDI Out -> Anubis MIDI IN and via RAVENNA/RTP configure your MIDI so that your Keyboard triggers DAW VST instruments. The DAW source stream is then monitored from ANUBIS.
A DAW/MIDI program can as well return a MIDI out signal, that could play a MIDI partition via the MIDI Out that would be connected to the MIDI Input of an external Synthesizer.
Use Anubis MIDI I/O with a Sound Module for Recording or Live
Connect a Keyboard MIDI Out to the Anubis MIDI IN and via RAVENNA/RTP configure your MIDI for recording in your DAW. The DAW playout RAVENNA/AES67 source stream would be monitored from ANUBIS.
Connect your Keyboard MIDI Thru to a MIDI Sound Module and this one to the Anubis analog inputs, then configure your DAW for recording the Anubis inputs. In Live performance you could also do without the DAW, with a Keyboard connected to a Sound Module and to the Anubis Line inputs 1-2, and can benefit from the Anubis internal Mixer.
Prerequisites
It is mandatory to use a MIDI Jack ¼ with the proper pin out. Follow the previous use case Monitoring and Inputs setup.
About the Anubis MIDI I/O
The Anubis MIDI I/O provides a MIDI connection between class compliant Core MIDI devices such as keyboards, drum machines, sound modules and other controller.
The MIDI IN and MIDI OUT ports located at back of the Anubis use a 1/4" jack sockets for connection of external MIDI equipment, refer to the User Manual Appendices section for details on the MIDI cable pinout.
The MIDI ports will be available in your computer once the Anubis drivers are installed and once you’ve follow the PC or Mac procedure below.
Note: Anubis can be use either with MIDI I/O or GPIO. MIDI I/O is the default mode and can be set from the Anubis >Settings>I/O>Triggers page
Warning: Merging recommends to Power off Anubis when making your MIDI IO Connections to avoid damage to the instrument and other devices.
Procedure for Windows users
- Make sure your Anubis is detected in MT Discovery
- Download and install RTPMidi http://www.tobias-erichsen.de/software.html
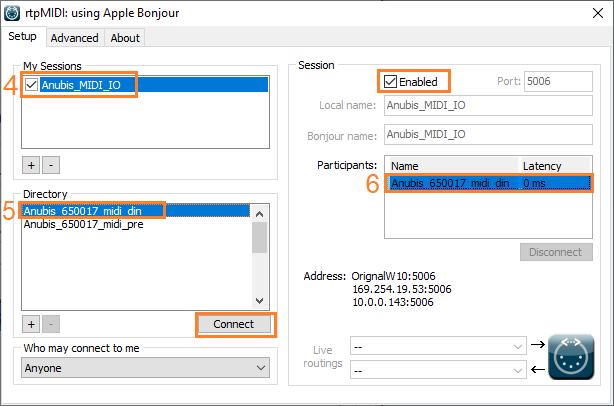
- Start RTP MIDI
- Under My Sessions section, click on the + sign to create a new session, and name it.
- Once the Session has been created, select the Anubis_<Serial>_midi_din in the available streams and click on Connect.
- The midi_din stream will be passed in the Participants section, make sure that this one is enabled above. You can now use it in your preferred DAW/MIDI application.
Procedure for MacOS users
- Connect your MIDI controller (such as a keyboard) to your Anubis MIDI I/O connector.
If you're using a MIDI interface, connect the Anubis RAVENNA cable to your Mac ethernet interface. - Launch your DAW/MIDI application for MIDI use.
- The Anubis MIDI port should be available for configuration.
Reaper on Mac example :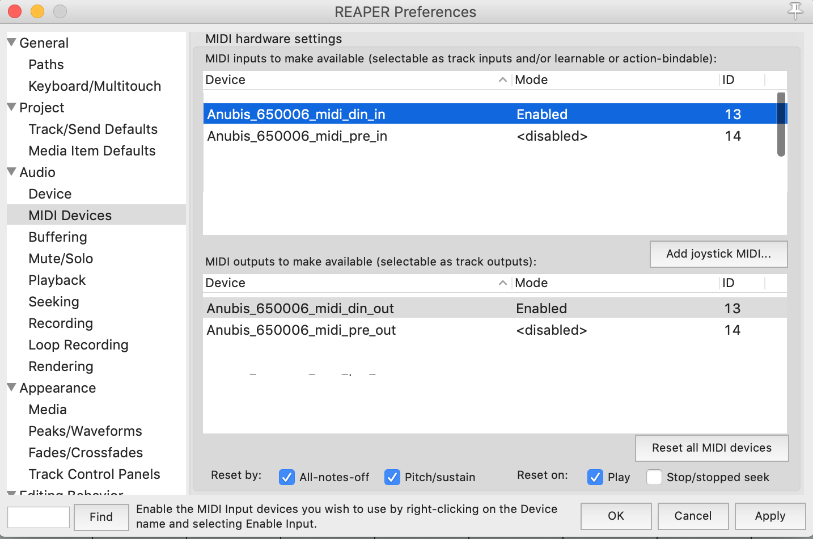
ProTools on Mac example :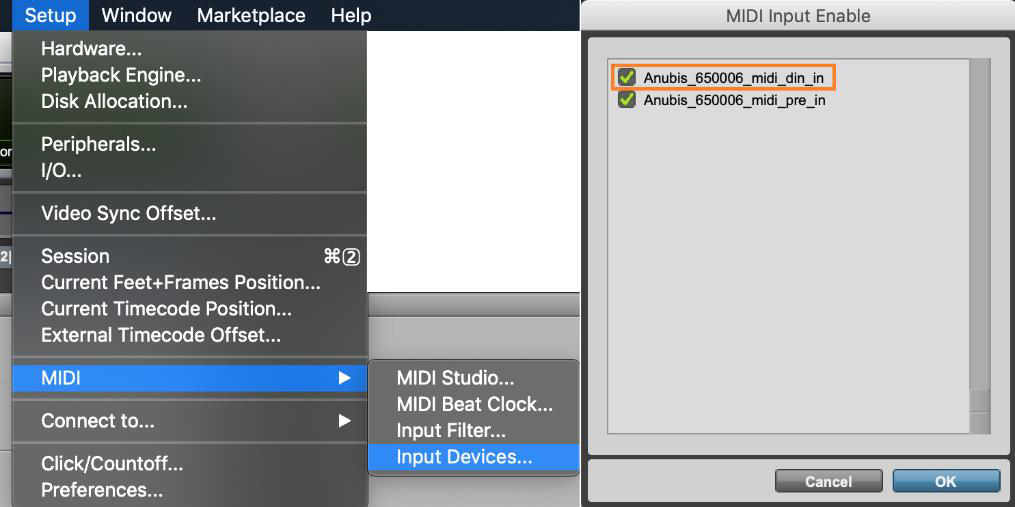
You can now integrate Anubis in your MIDI devices setup.
Note : The MIDI Input and Output located on the back of the Anubis can also be used to send and receive MIDI timecode (MTC).
By doing so, you can use an application supporting MTC to synchronize a multitrack recorder (MTR/DAW) and MIDI devices.
All details in the TimeCode setup page (ASIO or Virtual Audio Device).