How to provide a Wireshark capture.
- Download from https://www.wireshark.org/download.html
- Install Wireshark.
On Windows :
Use the default installation options (USBPCap and additional installation options are not required)
On MacOS :
Open the dmg disk image and drag Wireshark to your /Applications folder.
In order to capture packets, you must install the “ChmodBPF” launch daemon.
You can do so by opening the Install ChmodBPF.pkg file in the Wireshark .dmg or from Wireshark iself by opening Wireshark > About Wireshark, selecting the “Folders” tab, and double-clicking “macOS Extras”. - Reboot your computer and start your RAVENNA/AES67 Applications
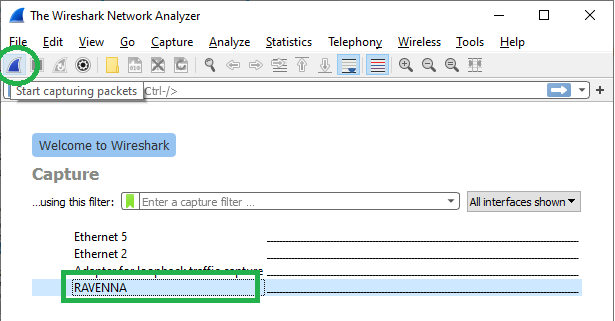
- Start Wireshark
Locate your RAVENNA/AES67 network interface.
- Double click on the interface or click on the Capture button.
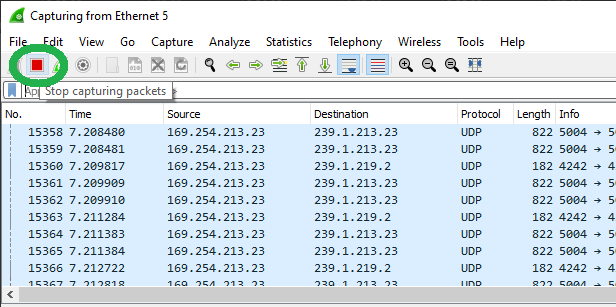
- Let the capture run 90 seconds.
Important note : if your issue is intermittent, make sure your capture is made while your issue is happening. - Click on the Stop Capture button
- Go in the File > Save menu
Please click on the "Compress with gzip" option to reduce the size of the file.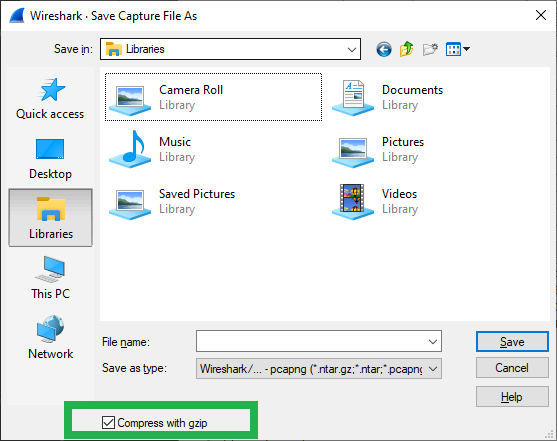
- Please send the .gz file
Due to the size of the file, you will need to send it with Wetransfer, DropBox, GoogleDrive,... (not with regular emails).
Tip : The interface names are the ones used in Windows.
You can simply rename your interface in Windows Network and Sharing center.
Please restart the Wireshark application, your interface will be available with its new name.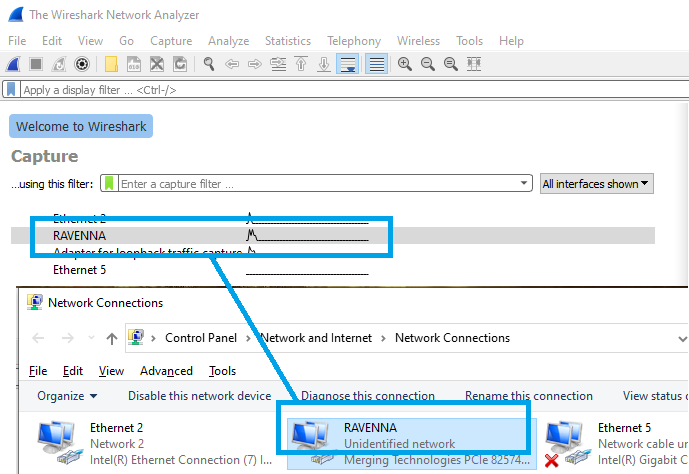
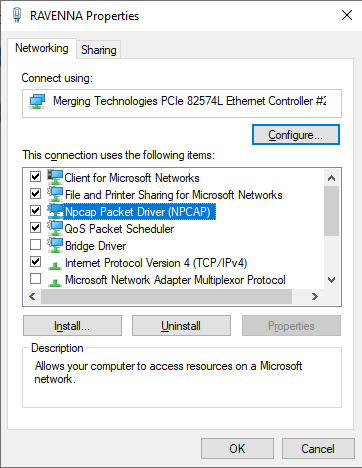
Tip : If you don't see your interface in Wireshark's list, go in Windows Network and Sharing center and right click on the required interface to access its Properties.
Make sure the Npcap Packet Driver (NPCAP) is ticked and click on OK to confirm the change.
Please restart the Wireshark application, your interface should be available now.