MassCore - modifiying Intel Hyper-Threading setting.
Enabling / disabling the Intel Hyper-Threading technology on your CPU changes the number of Cores, and therefore may lead to MassCore misconfiguration, preventing Pyramix / Ovation to start properly.
Note : Changing the Hyper-Threading setting may prevent MassCore to start, some Windows and BIOS skills are required !
Identifying your CPU
If you are not sure of your CPU model and the number of cores available. see Windows Control Panel > System : Processor to identify your CPU model.
You can then visit the Intel Product Specifications website https://ark.intel.com/content/www/us/en/ark.html and refer to the # of Cores and # of Threads.
(If both # of Cores and # of Threads are the same, it means your CPU has no Hyper-Threading feature).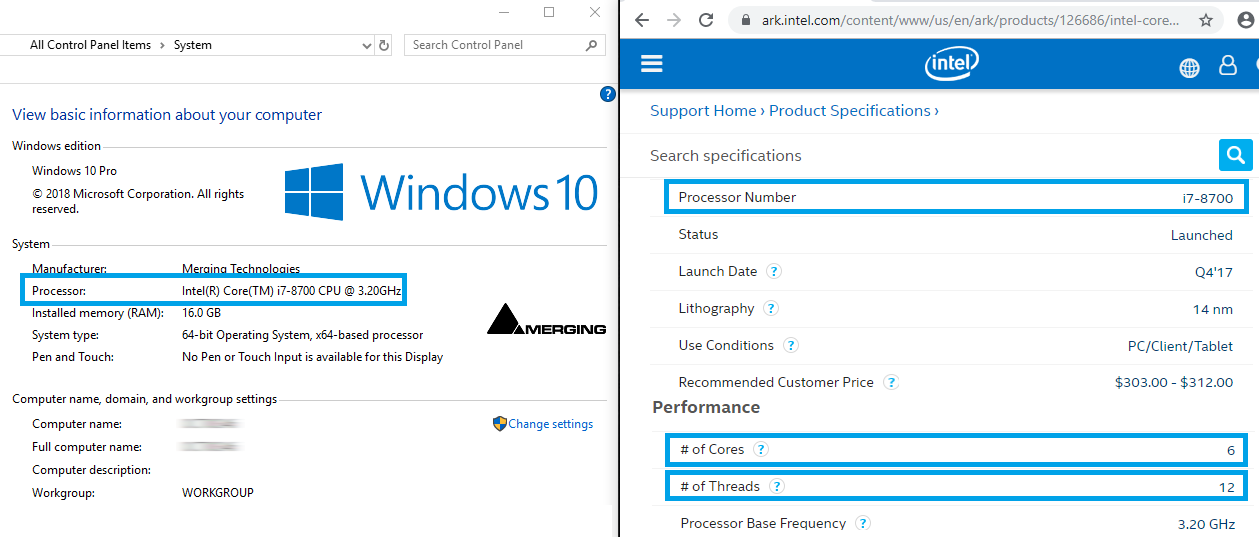
Disabling Intel Hyper-Threading
- Boot your computer in MassCore mode.
- Go in MT Security panel and note your current CPU configuration.
Depending on your MassCore authorizations, the number of Cores might differ.
If you don't have the MassCore SMP key ("SMP key not present" message),the number of Cores for MassCore will always be 1.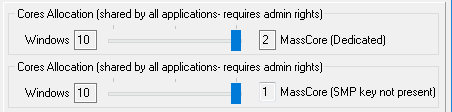
- Go in BIOS and disable Intel Hyper-Threading (see motherboard configuration guides for details)
- Reboot the system, but with the standard Windows boot line (non Masscore)
- Go in Windows registry editor (C:/Windows/regedit.exe)
Browse to HKEY_LOCAL_MACHINE\SYSTEM\CurrentControlSet\Control\RTX64 - Set the following values :
"NumberofProcessorsEnabled" : divide the value by 2 .
This is the number of cores available on your CPU (in our example, the value to enter is 6).
"NumberofRtssProcessorsRequest" divide the value by 2. If this value is 1, do not change it.
This is the number of cores assigned to MassCore (in our example, the value to enter is 1).
"NumberOfWinProcessorsRequest"= divide the value by 2.
This is the number of remaining cores for Windows (in our example, the value to enter is 5).
Do not modify any other value.
Make sure you enter the value in decimal and not in Hexadecimal.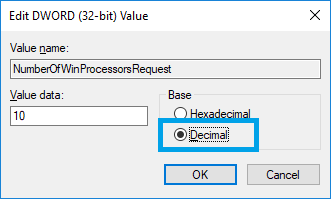
- Go in Windows Start menu > Windows Administrative Tools > System Configuration > Boot tab.
Select the MassCore line, which should be tagged as Default OS, but not Current OS.
If it is tagged as Current OS, please restart the computer with the standard Windows boot line (Windows does not allow to modify the Current OS). - Click on Advanced options
Set Numbers of processors to the same value as "NumberOfWinProcessorsRequest" above (in our example, the value to enter is 5).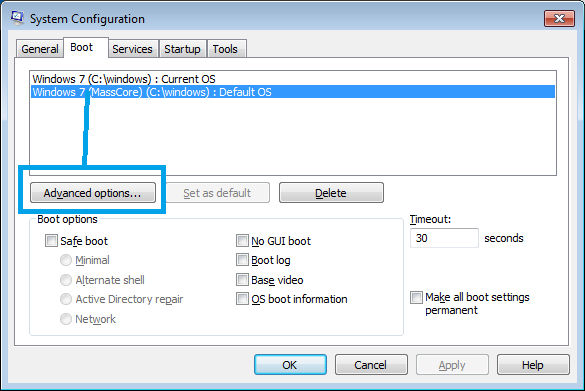
- Restart the computer, this time in in MassCore mode.
- Go in VS3 Control Panel and check the Cores Allocation
Enabling Intel Hyper-Threading
- Go in BIOS and enable Intel Hyper-Threading (see motherboard configuration guides for details)
- Boot the system with the standard Windows boot line (non Masscore)
- Go in Windows registry editor (C:/Windows/regedit.exe)
Browse to HKEY_LOCAL_MACHINE\SYSTEM\CurrentControlSet\Control\RTX64 - Set the following values :
"NumberofProcessorsEnabled" : multiply the value by 2.
This is the number of cores available on your CPU (= # of Threads - see Identifying your CPU.
"NumberofRtssProcessorsRequest" multiply the value by 2. If this value is 1, do not change it.
This is the number of cores assigned to MassCore.
"NumberOfWinProcessorsRequest"= multiply the value by 2.
This is the number of remaining cores for Windows.
Do not modify any other value.
Make sure you enter the value in decimal and not in Hexadecimal. - Go in Windows Start menu > Windows Administrative Tools > System Configuration > Boot tab.
Select the MassCore line, which should be tagged as Default OS, but not Current OS.
If it is tagged as Current OS, please restart the computer with the standard Windows boot line (Windows does not allow to modify the Current OS). - Click on Advanced options
Set Numbers of processors to the same value as "NumberOfWinProcessorsRequest" above. - Restart the computer, this time in in MassCore mode.
- Go in VS3 Control Panel and check the Cores Allocation.
Depending on your MassCore authorizations, the number of Cores might differ.
If you don't have the MassCore SMP key ("SMP key not present" message),the number of Cores for MassCore will always be 1.