Cisco SG300/350 Multiple switches configuration.
When connecting Cisco SG350/SG300 switches on each other, you must configure the multicast router. If you don't the PTP packets will not be sent through the switches and there will be one master PTP per switch, or the devices will be flooded with unwanted streams and PTP slaves won't be able to lock.
Such configuration is only valable for CISCO switches
Note : such configuration requires some network skills.
Basic principle
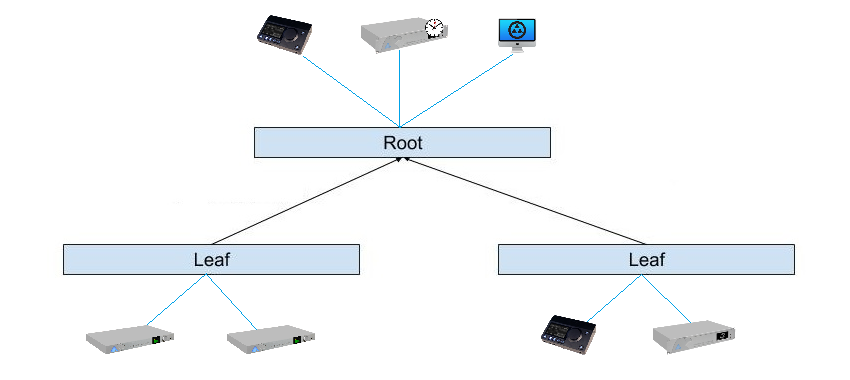
One Root switch (master), one or many leaf switches (slaves). The Root switch is IGMP querier, all leaf switch transmit *all* streams they get as input, back to the root.
So bandwith per uplink increase when going to the root, watch out for congestion ! On busy networks, one might need a 10Gb root switch with 10Gb uplinks.
PTP Master device should be connected to the root switch, to avoid introducing additional PTP jitter (too many network "hops".)
Switches Configuration
- Assuming the switch has already been configured with Merging recommendations or configuration file.
(See this page for details)
The SG300 Firmware should be version 1.4.7.6 (or higher)
The SG350 Firmware should be version 2.3.5.63 (or higher) - Go to the interface page and login.
- Activate the display mode "Advanced" on the top right corner (SG350 only)

- Browse to Multicast > Properties
Activate Bridge Multicast Filtering Status
Set Forwarding Method for IPv6 and IPv4 to IP Group Address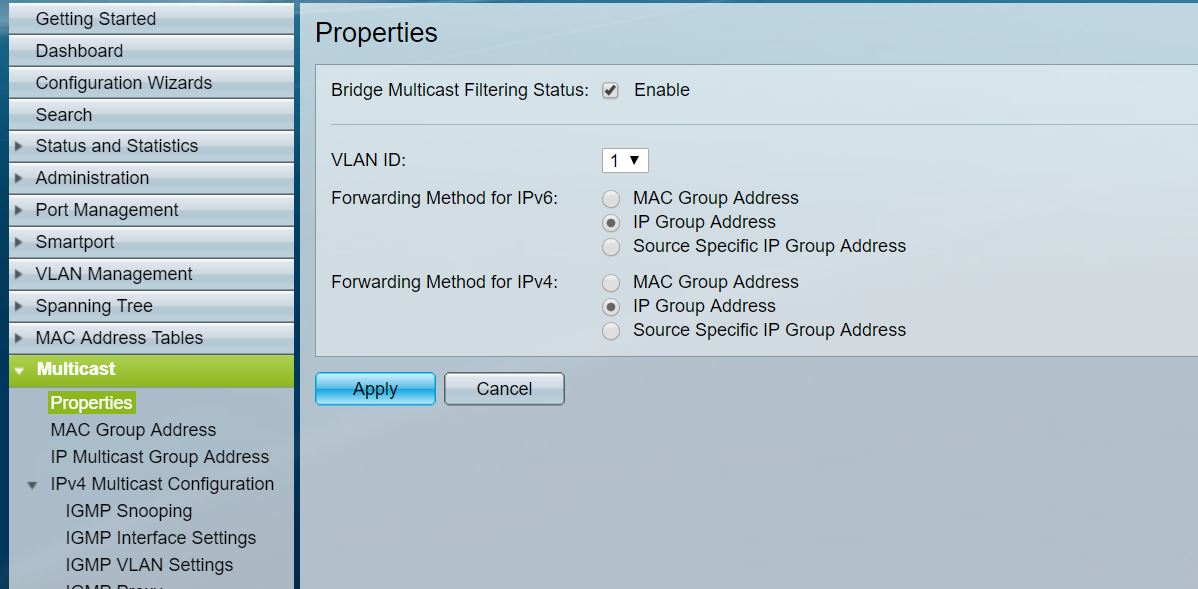
- Browse to Multicast > IPv4 Multicast Configuration > IGMP Snooping.
This setting is different on the Root (master) and Leaf (slave) switches- Root switch : the Switch is the Master Querier (Main Switch in the control room)
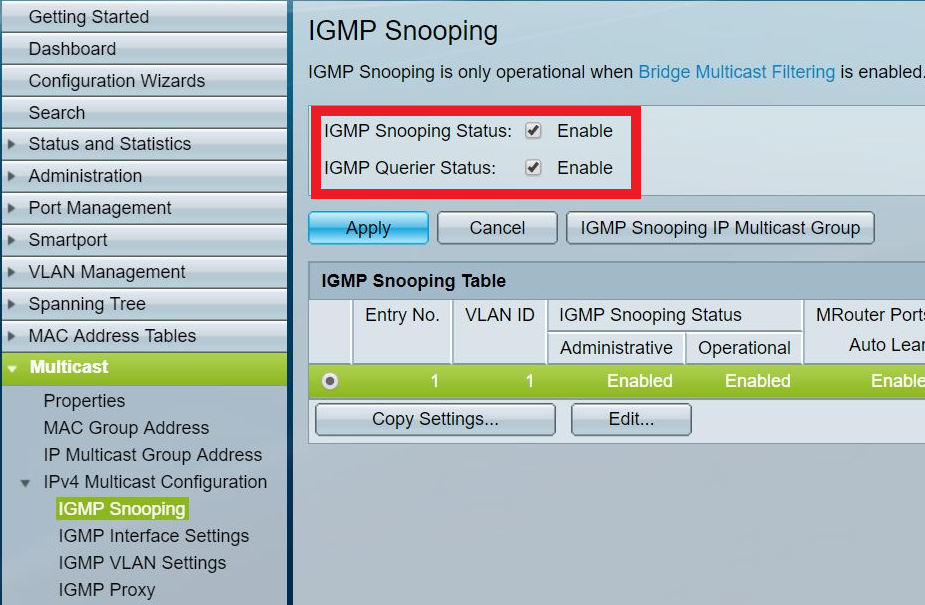
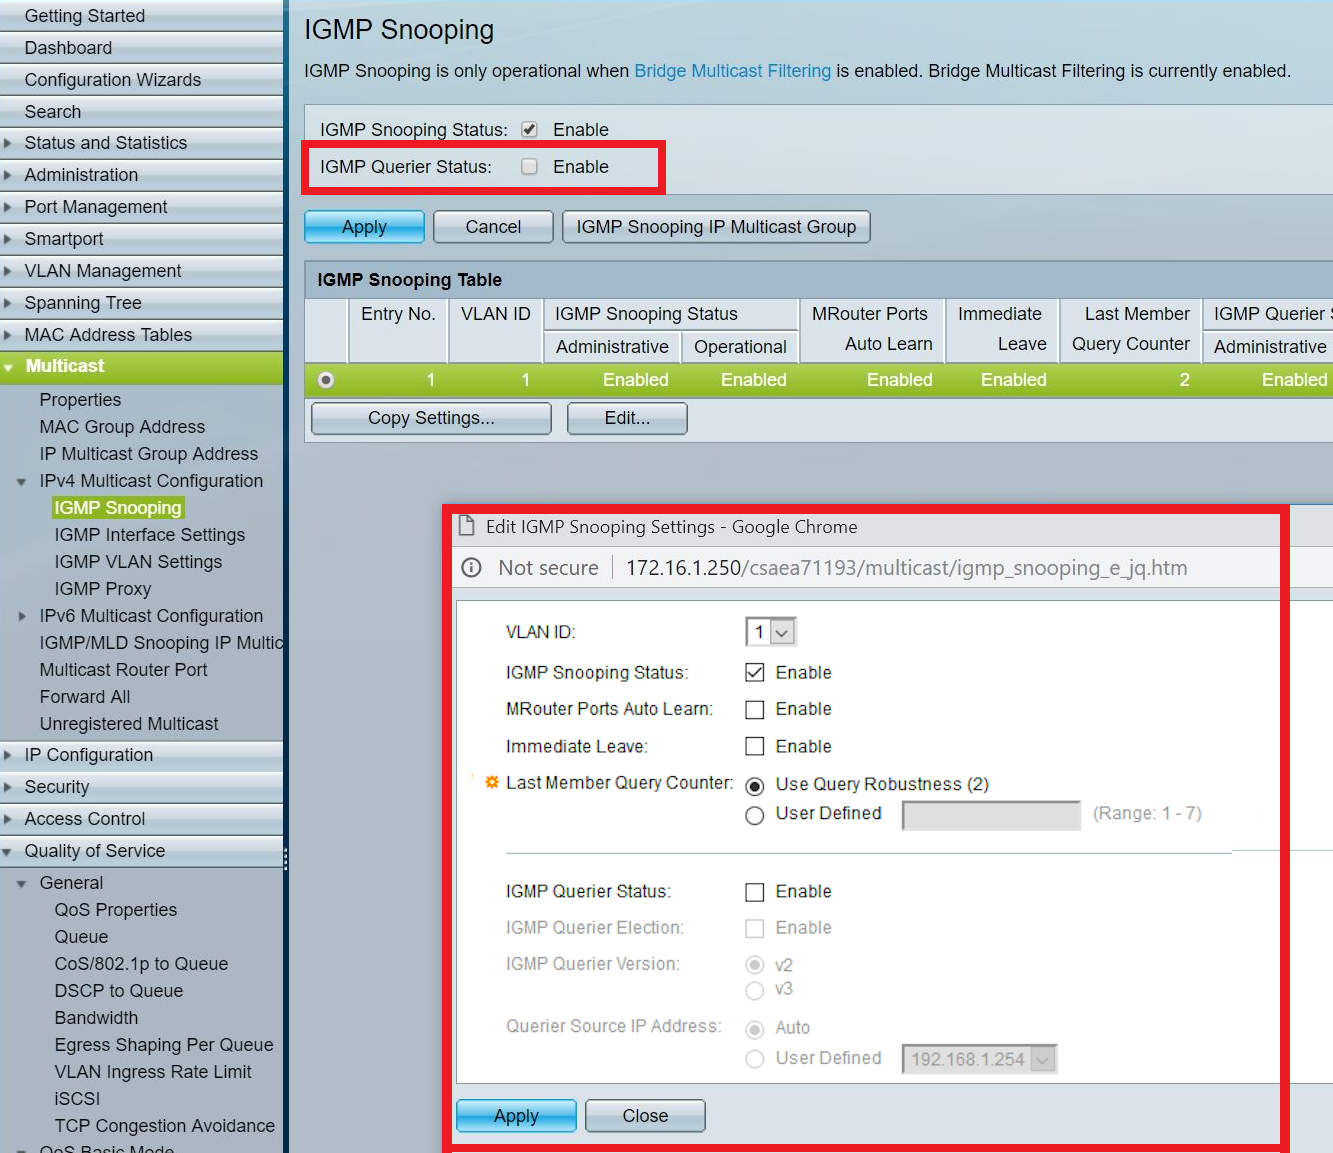
Select the required entry and click on Edit
Apply the following settings :
- Leaf switch : the Switch is a Slave, same step but with different settings
- Root switch : the Switch is the Master Querier (Main Switch in the control room)
- Browse to Multicast > IPv4 Multicast Configuration > IGMP VLAN Settings
Select the required VLAN and click on Edit.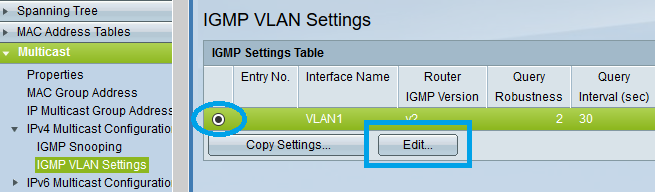
- Set the Query Interval value to 30 (seconds).
Click on Apply once done.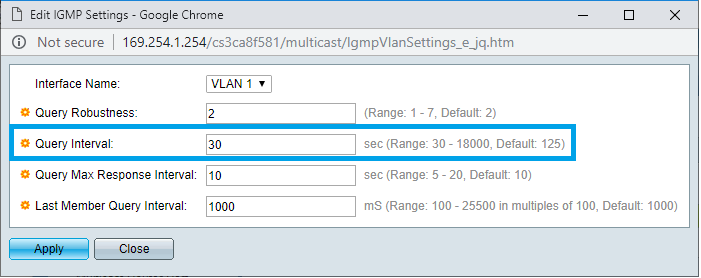
- Browse to Multicast > IPv4 Multicast Configuration > IGMP Proxy.
Everything must be disabled
Click on Apply once done.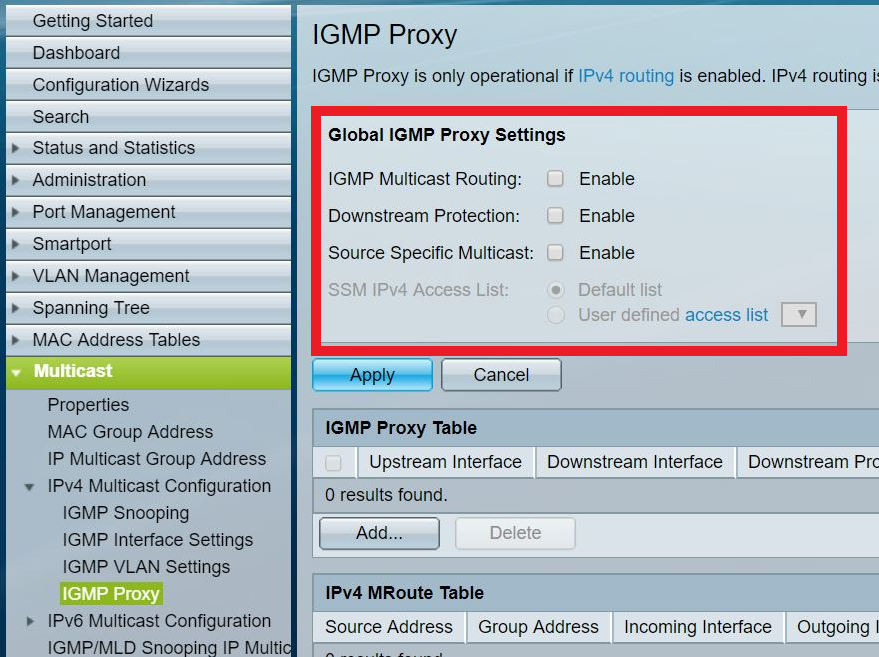
- Browse to Multicast > Multicast Router Port
On the Root - Master switch :
Each Interface must be set to Forbidden
Click on Apply once done
On the Leaf - Slave switch :
Each Interface must be set to Forbidden
Then only put the port used for the link to the Root-Master switch to STATIC
Click on Apply once done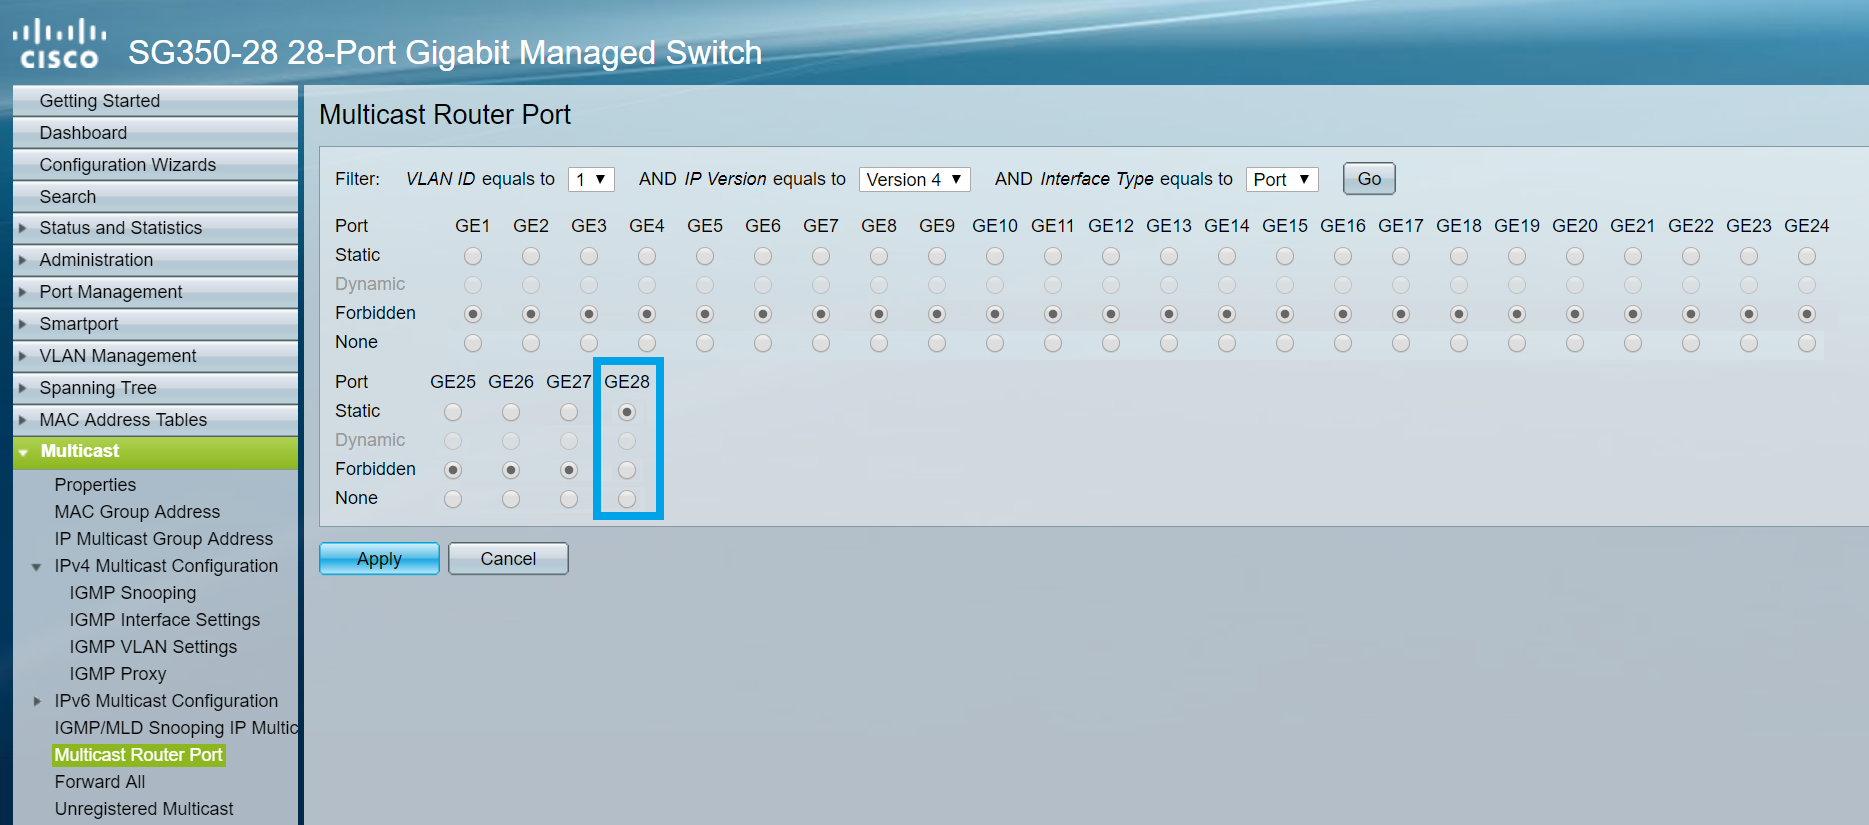
- Browse to Multicast >Unregistered Multicast.
Set all ports to Filtering.
Click on Apply once done.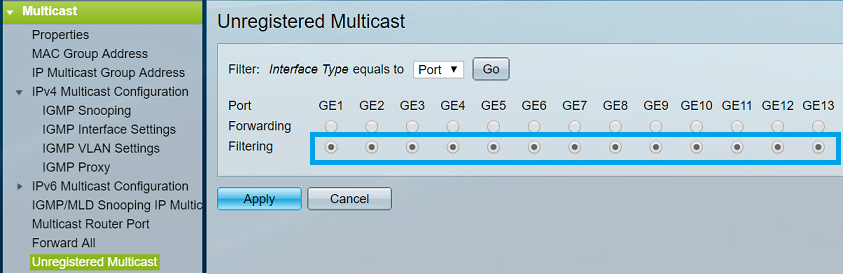
Dante AES67 users have to add IP Multicast Groups :
Go in IP Multicast Group Address and click on Add. Enter VLAN ID 1 and 224.0.0.230 as IP Multicast Group Address.
Click on Apply, then select the 224.0.0.230 Group and click on Details.
Set the ports connected to Dante devices (including the computer that hosts Dante Controller) to Static and click on Apply.
Repeat the same operation for addresses 224.0.0.231, 224.0.0.232 and 224.0.0.233
(Example with Dante devices on port 9-10).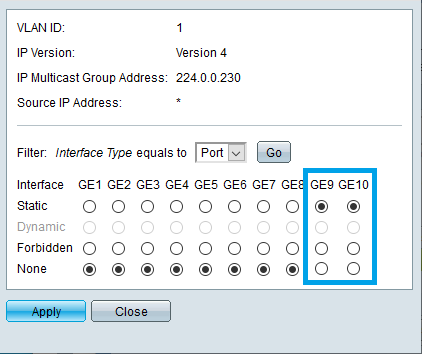
- Each switch should have its own IP address.
Browse to Administration > Management Interface > IPv4 Interface and edit the IP Address field.
Click on Apply once done.
See the SG300 configuration guide or SG350 configuration guide for details.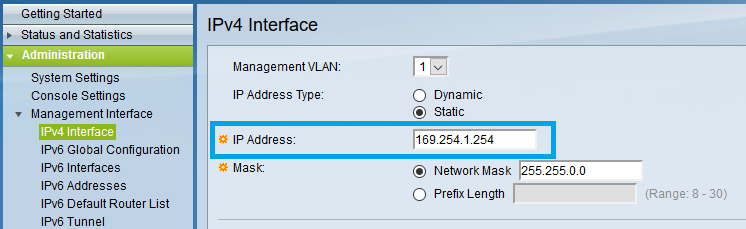
- Browse to Quality of Service > General > DSCP to Queue
Set same values as below, depending on your Cisco switch model.
Click on Apply once done.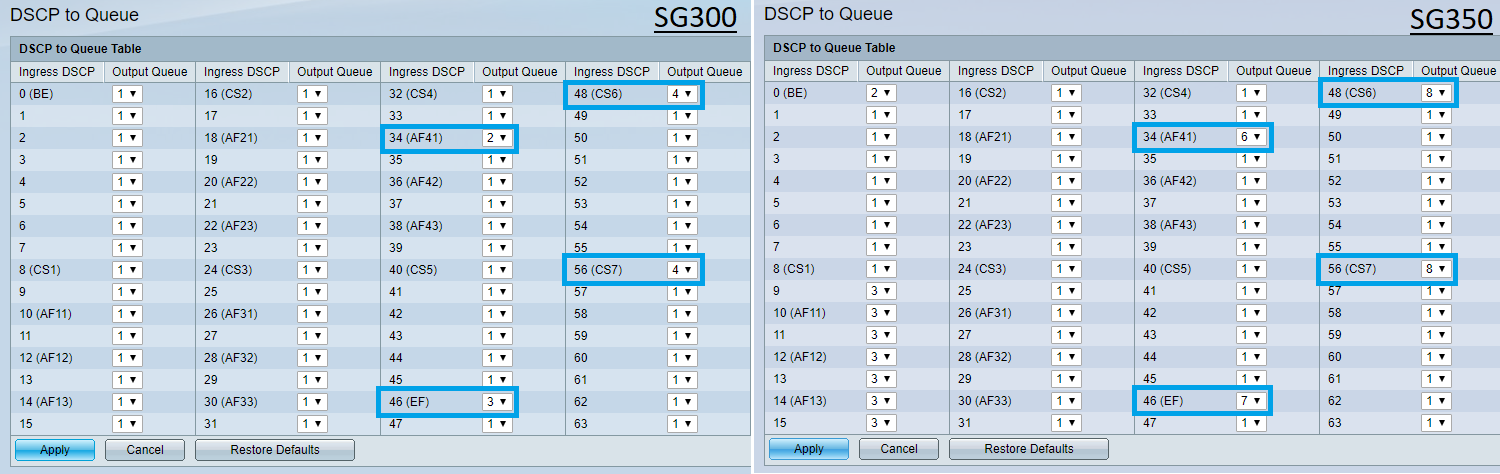
- Save the configuration:
Go in Administration > File Management > File Operations.
Select Duplicate as Operation Type.
Source File Name : Running Configuration
Destination File Name : Startup Configuration
Click on Apply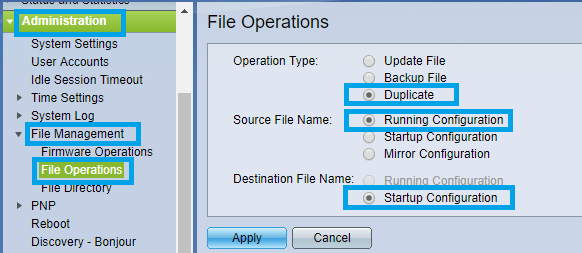
You must now restart the switch for the changes to apply.
Click Administration > Reboot
Select Immediate and click on Reboot button.
Note that the device might take some time to reboot.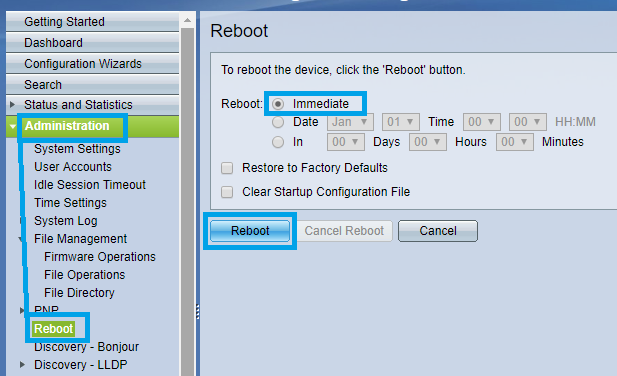
Additional notes
Selecting the PTP Master device
PTP Master should be selected depending on the number of switch it has to go through :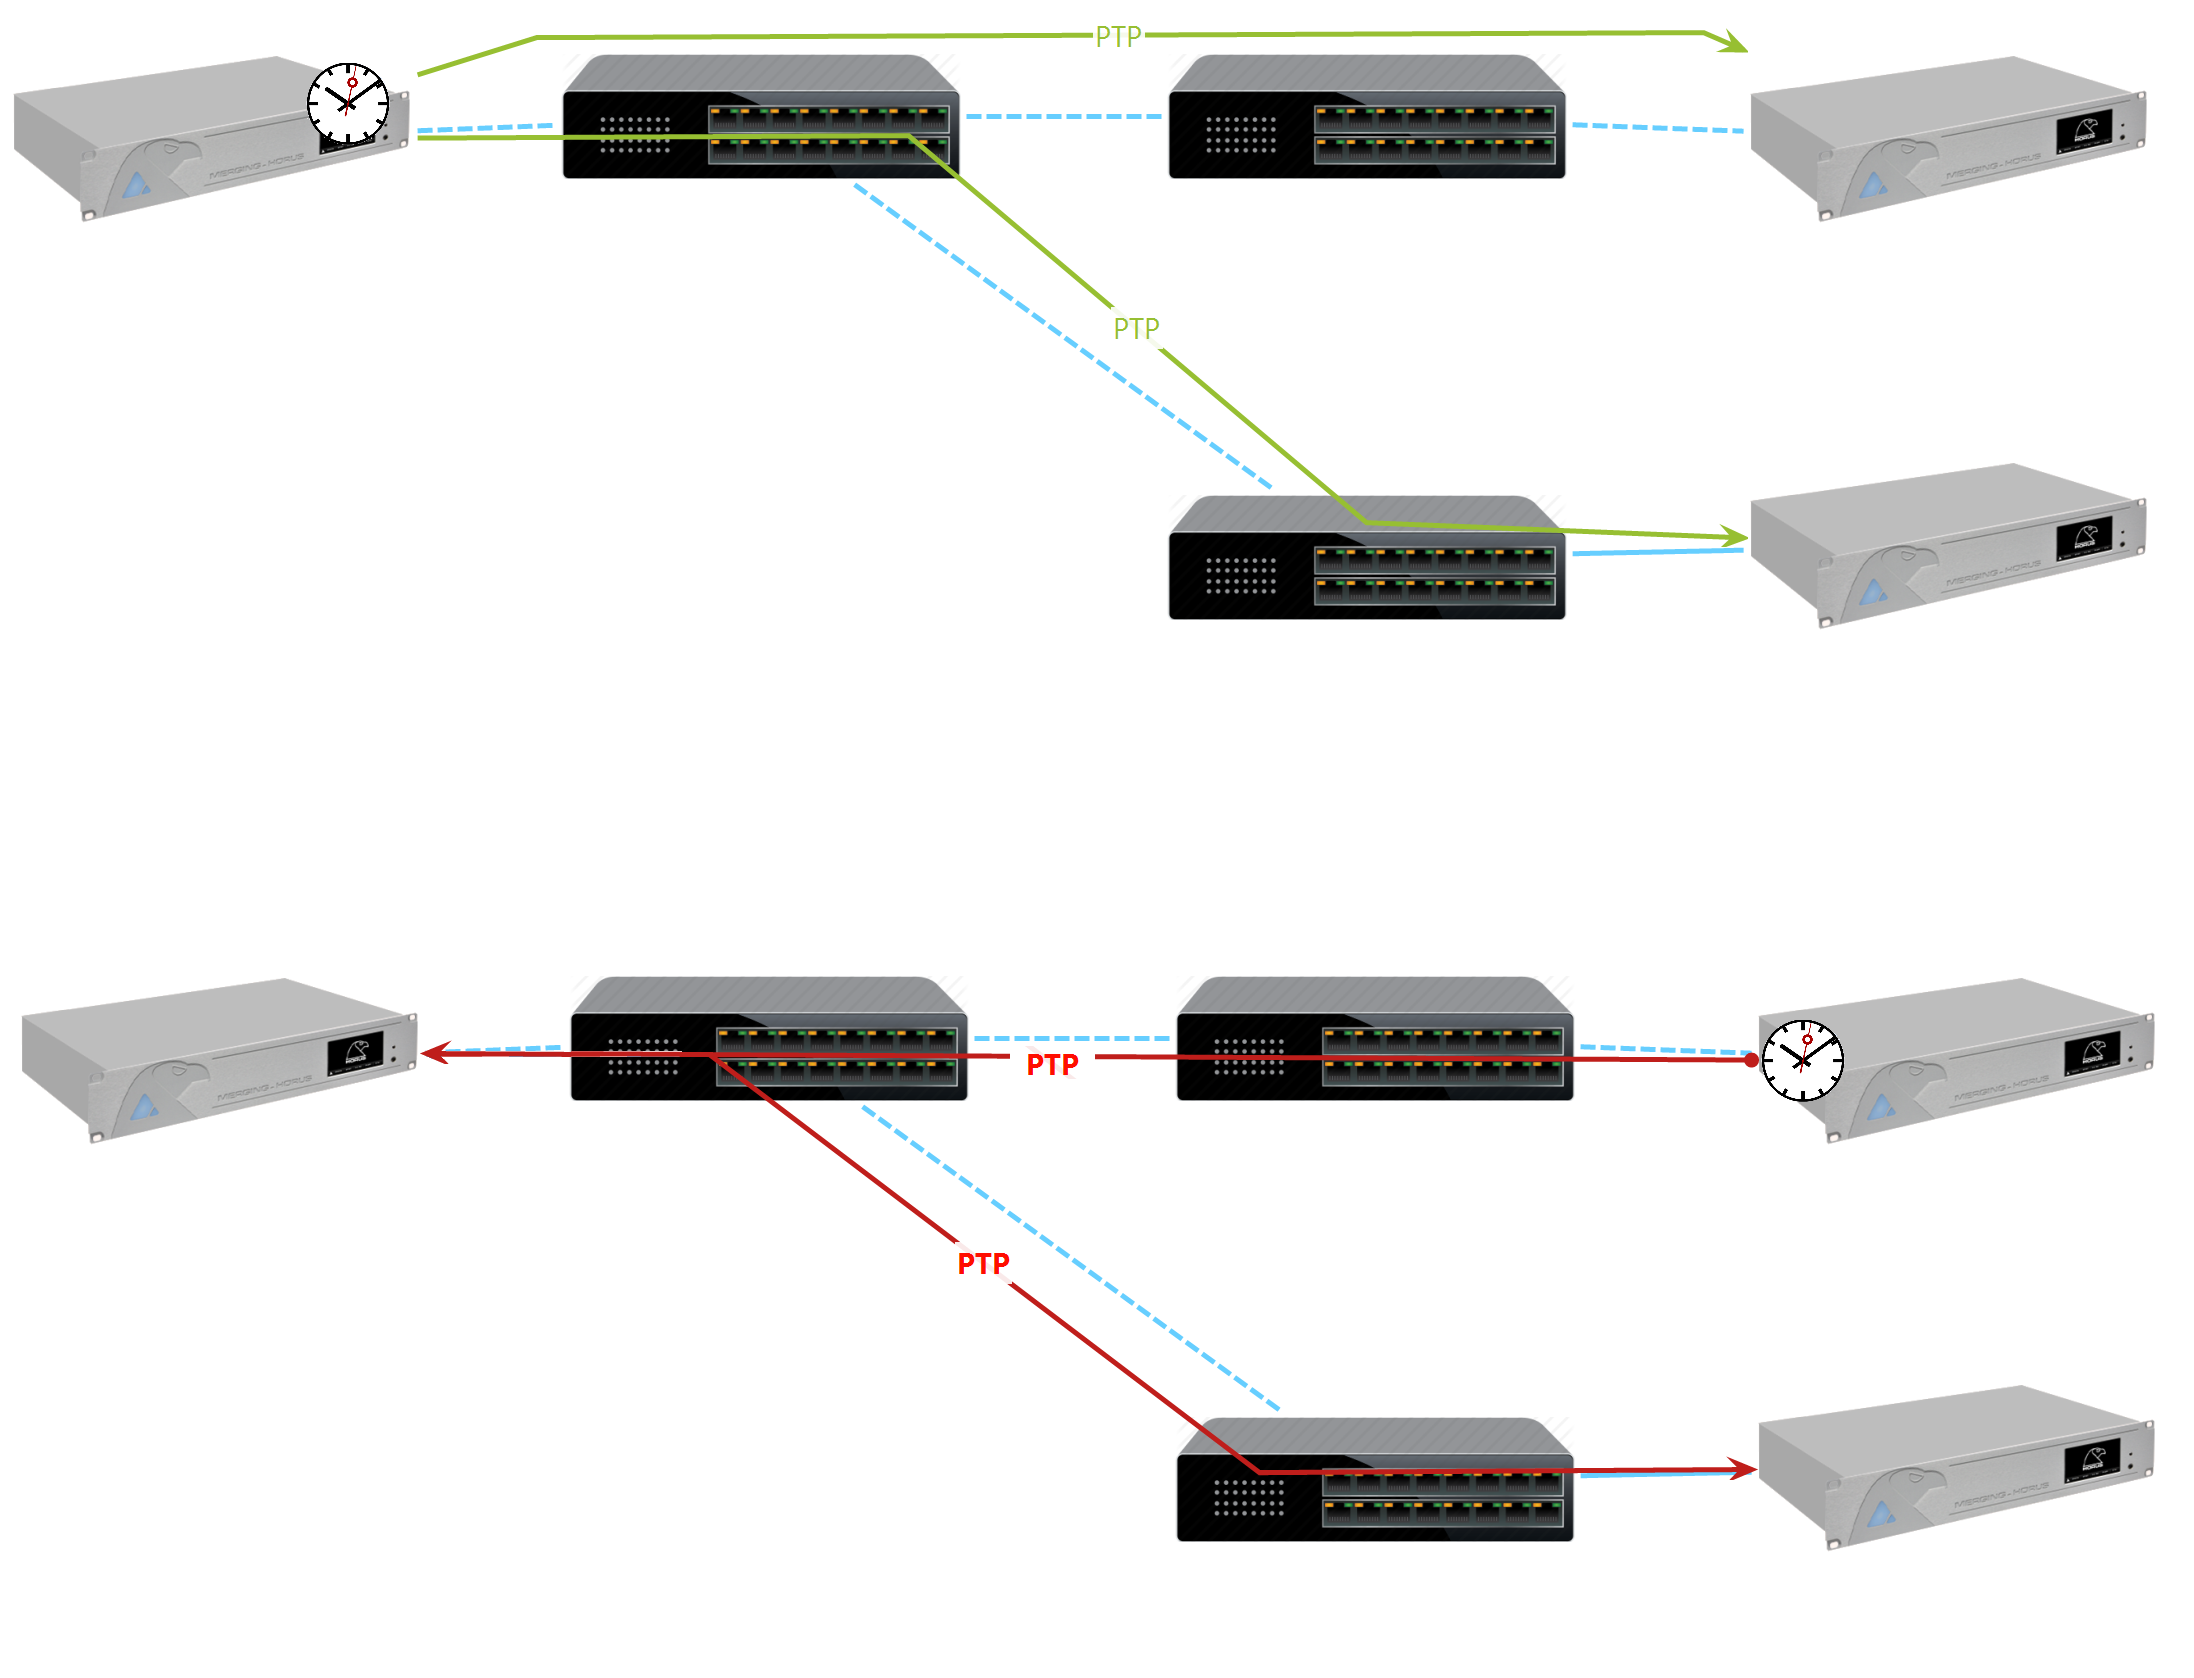
Please consult this page for additional information on PTP priorities