Edit audio from Pyramix FX Rendering in RX Audio Editor
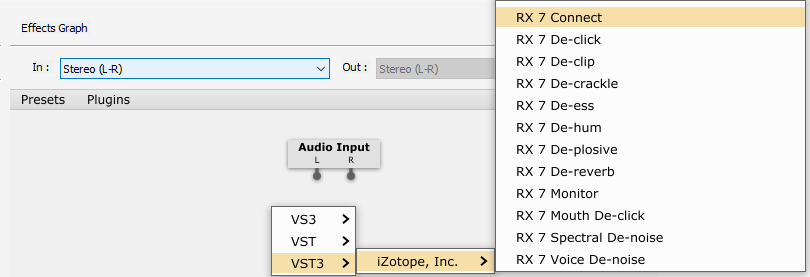
- In the FX Rendering, right click in the Effects Graph zone
- Select VST3 > Izotope, Inc. > RX 7 Connect
- Configure the Audio Input.
Default is Stereo. Click on the drop down menu to select another input layout.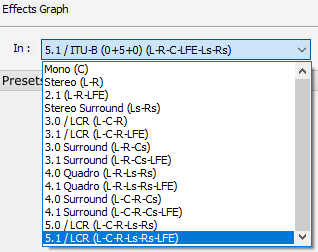
- Right click on the RX Connect node and select Configure Audio I/O
Default is Stereo. Click on the Channel Layout drop down menu to select another layout.
- Right click on the RX Connect node and this time select Auto-connect pins
You may also manually connect the pins between RX Connect and the inputs / outputs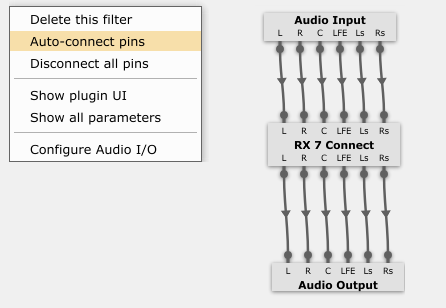
- Select a clip in the Pyramix timeline. Remember that RX can handle up to 8 tracks *
- Configure the Processing according to your needs (see Pyramix user manual for further details)
- Press on Render
The audio is now transferred in Izotope RX application - Edit your file in RX.
- When finished, click on Send Back.

- Back in Pyramix, click on Render to get the processed file in Pyramix timeline.
* The RX 7 Audio Editor standalone application provides multichannel support for channel counts as high as 7.1. RX Connect and RX Monitor support multichannel so far as to transfer the multichannel audio from your DAW to the standalone application.
For more Channels support it is possible to export your multichannel audio from your Pyramix DAW and import it into RX 7 Audio Editor manually.
Monitor RX Audio Editor in Pyramix
- With RX Monitor :
In RX Audio Editor, go in Edit > Preferences menu.
In the audio tab, set the Driver type to RX Monitor
In Pyramix, add the RX Monitor VST plugin in your Mixer, on a strip or bus corresponding to the required channel layout. - With MT ASIO Bridge :
Go in VS3 Control Panel and activate the Audio Bridge in MT ASIO Bridge Host.
In RX Audio Editor, go in Edit > Preferences menu.
In the audio tab, set the Driver type to ASIO, set the device to MT ASIO Bridge.
Untick the Release when not in use option (may generate noise when not in use).
Map the required inputs in your mixer strips, and set your strips in Input monitoring mode.
In this configuration, Pyramix must be started before RX (as it hosts the ASIO bridging device).