BASIC ANUBIS MONITORING SETUP.
SetUp
Using a Main Speaker Set and headphones in order to Monitor the DAW Main playout Source.
Prerequisites
First follow the the Drivers Installation Procedure and ensure that you have correctly connected and powered up your Anubis.
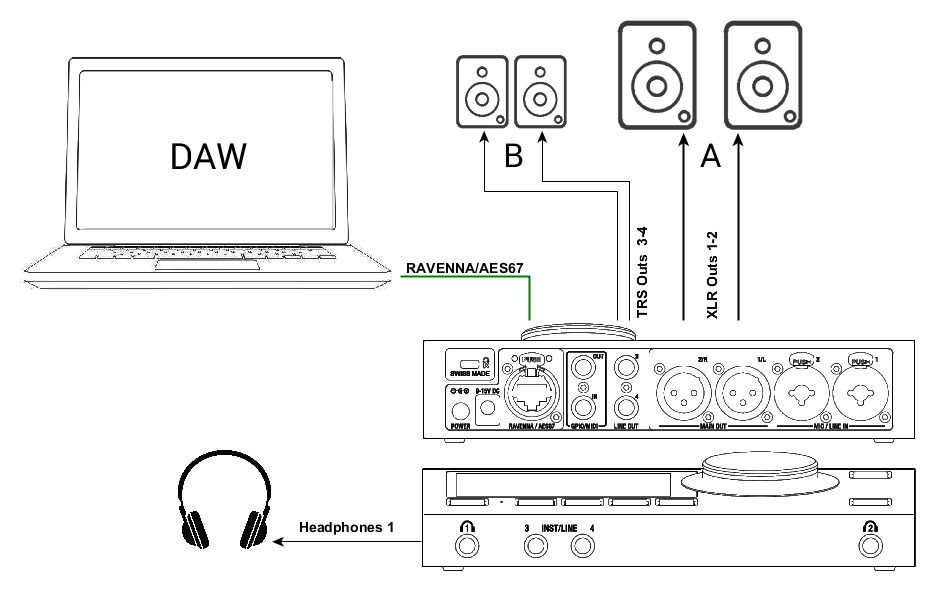
Connect your Active Monitors (or Power Amp) to the Anubis physical Outputs XLR 1 and 2 and/or TRS outputs 3-4 if you have alternate Monitors in your setup.
Procedure
- In order to connect your DAW playback to Anubis you must first have a Source available to host your DAW Playout Stream 1-2 (if stereo) Note: Ex-factory Anubis comes with a DAW 1-2 Source. If this one is not available in the Sources page, create it, refer to this page.
- Launch your DAW making sure it is loading Merging’s Driver (or MassCore for Pyramix users) and then open ANEMAN.
- Within ANEMAN connect the ASIO Driver Output 1-2 (or VAD Outs 1-2) to the DAW Source 1-2.
Users can choose and apply either a Multicast or a Unicast connection.
Unicast: from one source to one destination i.e. One-to-One
Multicast: from one source to multiple destinations stating an interest in receiving the traffic i.e. One-to-Many.
ANEMAN DAW 1-2 Source connection (Open the Matrix view and select both Anubis and the Driver to establish a connection)
Note: If the connection is not successful, make sure that both your Anubis and Driver are at the Same Sampling Rate and Latency Frame mode (e.g. AES67-48 samples).
Mac OS users will only see the connections properly established once the DAW playback is engaged. Patch your Monitor Set. Ex- Factory Speaker Sets: A, B, and Headphones 1, 2 should already be patched to their respective physical outputs.
This can be verified and changed if desired under the Settings>Monitors Patch section.
Default Patching under the respective Sources and Monitors settings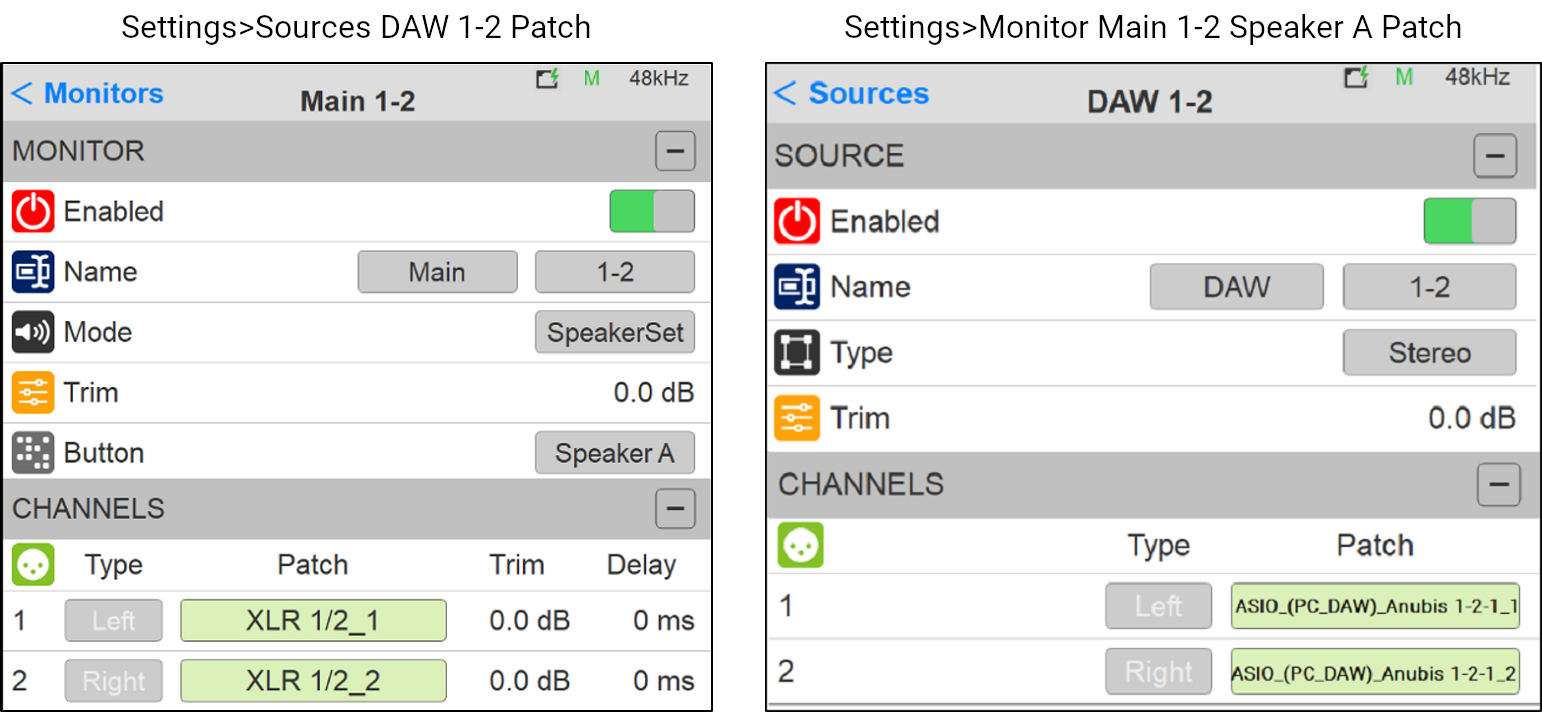
Note: Settings>Monitor Line 3-4 Speaker B should be patched to Patch to Jack 3/4_3 and Jack 3/4_4
Note: The operator is free to change the default patch in order to suit his Monitoring setup- Return to the Main Anubis Source page in order select which source and from which Monitor set you will monitor.
First select the Monitor Set (e.g. Anubis A or B button), then select the DAW 1-2 Source to monitor it.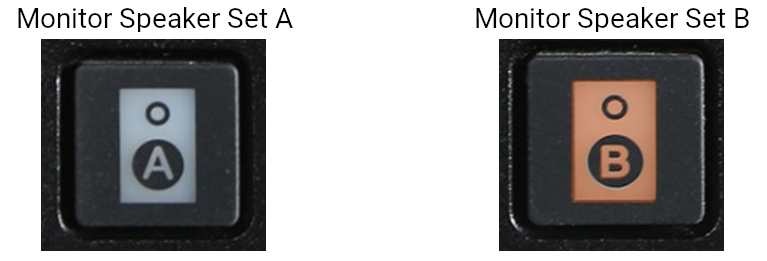

- In order to monitor multiple sources simultaneously enable the SUM option and sum your Sources selections.
To control the Headphones volume, simply select the Headphone 1 button and use the Anubis Rotary knob to adjust its Volume.
Note: The Speakers Set mode and Headphones mode listen to the same Sources selection. In order to listen to different Sources, a Monitoring Cue must be configured (refer to the Settings>Monitors Cue mode section)
Note: To connect mirrored outputs (an input/soirce to Multiple outputs) can be achieved from the RAVENNA Advances paged.
You are ready to start your Anubis Monitoring Mission and have full control over your DAW monitoring