...
- In the "Getting Started" page, click on "Change Device IP Adress"

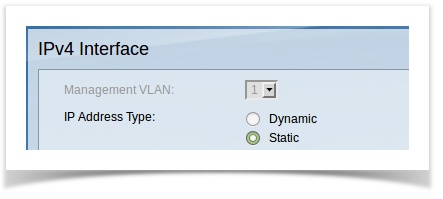
- On "IP Address Type" chose "Static"
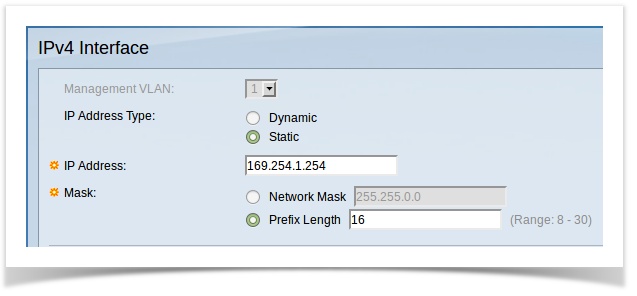
- In the "IP Address" field and on the "Mask" chose as follows:
That will make your switch administration page respond to that IP address.
Note that we used Prefix Lenght instead of Network mask (16 is the same as 255.255.0.0).
But you could also set it to 255.255.0.0 it would also work. - Click on "Apply" to apply the changes to the current running configuration.

Note that this ONLY Applies the changes to the CURRENT RUNNING CONFIGURATION.
That means that if you reboot the router, the changes will be LOST.
So to PREVENT THAT you need to SAVE them into the current configuration. - At the top right corner of the screen you will see "SAVE" blinking, click on it.

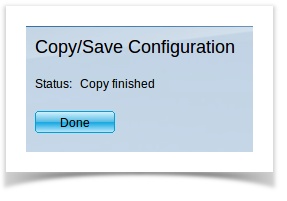
- A new page will open with the following:
Just CLICK ON APPLY, this will save the current running configuration to the startup configuration thus keeping your changes even if the
Switch is rebooted ( if you reset they revert back to factory defaults ).
- Click "OK" on the pop up window and its will start the save procedure, after that click on "Done" and you are all good.
NOTE, YOUR SWITCH WILL NOW RESPOND TO THE NEW IP ADDRESS.
SO YOU MAY NEED TO CHANGE YOUR COMPUTER IP INTO "AUTOMATIC"
The switch is now only accessible thru HTTP://169.254.1.254Merging Technologies SA
Email: support@merging.com
Le Verney 4, CH-1070 Puidoux
Switzerland