/
2.1 Change IP Adress
2.1 Change IP Adress
- Paulo Tavares
- David Jacques
- Nicolas Sturmel
Owned by Paulo Tavares
First step is to change the IP configuration to use a APIPA (Automatic Private Internet Protocol Addressing) type of IP.
The administration page will then be only accessed trough this new IP.
Putting this in an APIPA IP range (169.254.0.0/16) will ensure that you can always access its administration page.
Ravenna devices generally use APIPA IP range to communicate over the network.
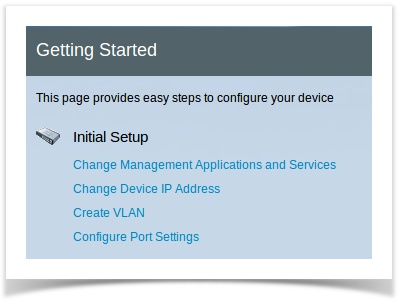
- In the "Getting Started" page, click on "Change Device IP Adress"
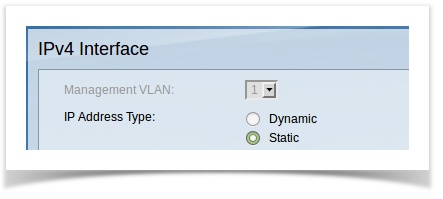
- On "IP Address Type" chose "Static"
- In the "IP Address" field and on the "Mask" chose as follows:
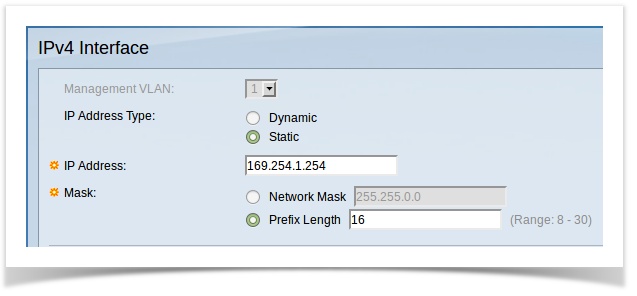
That will make your switch administration page respond to that IP address.
Note that we used Prefix Lenght instead of Network mask (16 is the same as 255.255.0.0).
But you could also set it to 255.255.0.0 it would also work. - Click on "Apply" to apply the changes to the current running configuration.
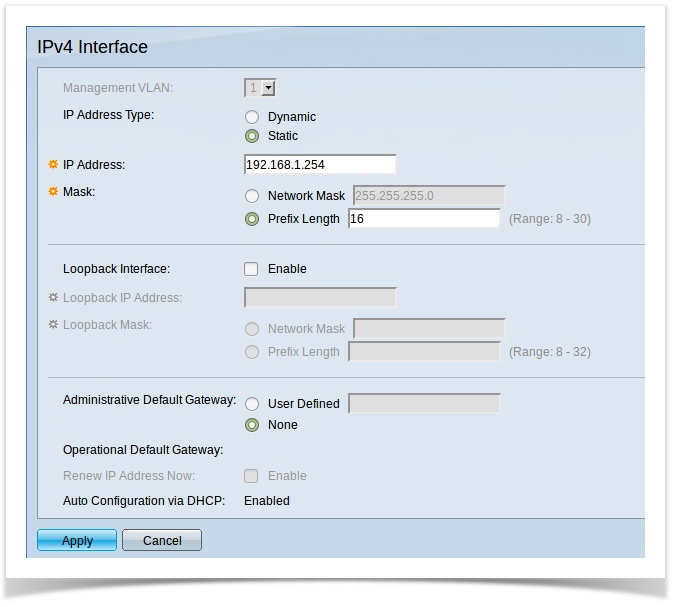
Note that this ONLY Applies the changes to the CURRENT RUNNING CONFIGURATION.
That means that if you reboot the router, the changes will be LOST.
So to PREVENT THAT you need to SAVE them into the current configuration. - At the top right corner of the screen you will see "SAVE" blinking, click on it.

- A new page will open with the following:
Just CLICK ON APPLY, this will save the current running configuration to the startup configuration thus keeping your changes even if the
Switch is rebooted ( if you reset they revert back to factory defaults ).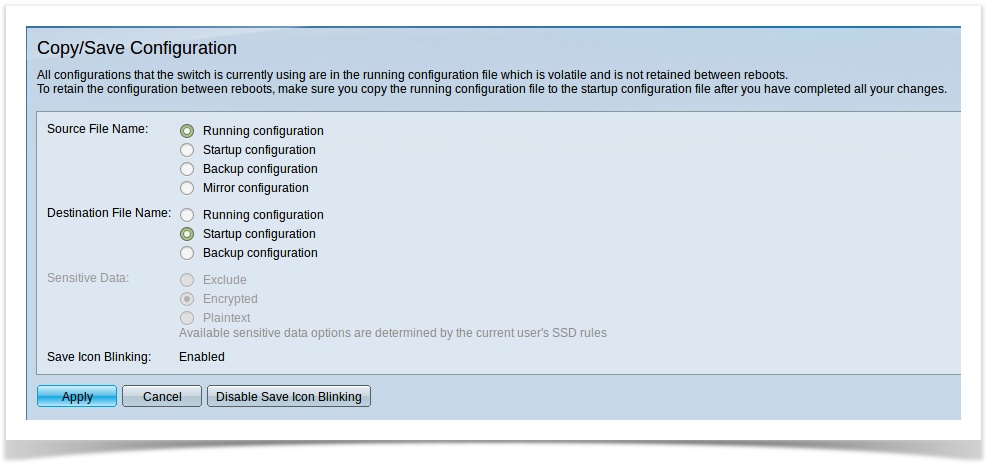
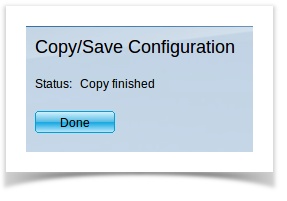
- Click "OK" on the pop up window and its will start the save procedure, after that click on "Done" and you are all good.
NOTE, YOUR SWITCH WILL NOW RESPOND TO THE NEW IP ADDRESS.
SO YOU MAY NEED TO CHANGE YOUR COMPUTER IP INTO "AUTOMATIC"
The switch is now only accessible thru HTTP://169.254.1.254
, multiple selections available,
Related content
2. SG-350 - Single VLAN configuration
2. SG-350 - Single VLAN configuration
More like this
Cisco Routers Manual Switch Configuration
Cisco Routers Manual Switch Configuration
More like this
3.1 Add a new VLAN
3.1 Add a new VLAN
More like this
Dell PowerConnect 2816 - 2808 Auto-configuration
Dell PowerConnect 2816 - 2808 Auto-configuration
More like this
Network considerations when using RAVENNA
Network considerations when using RAVENNA
More like this
2. Setup 1 - Single VLAN.
2. Setup 1 - Single VLAN.
More like this