How-to configure the JRiver WDM driver to get audio from Windows applications in your NADAC / NADAC Player
Prerequisite
The MERGING+NADAC ASIO driver is installed and configured (see this page for details)
JRiver Media Center is installed and configured for NADAC (see this page for details)
Step-by-step guide
- Start JRiver Media Center.
- Click on the Tools drop down menu, and select Options.
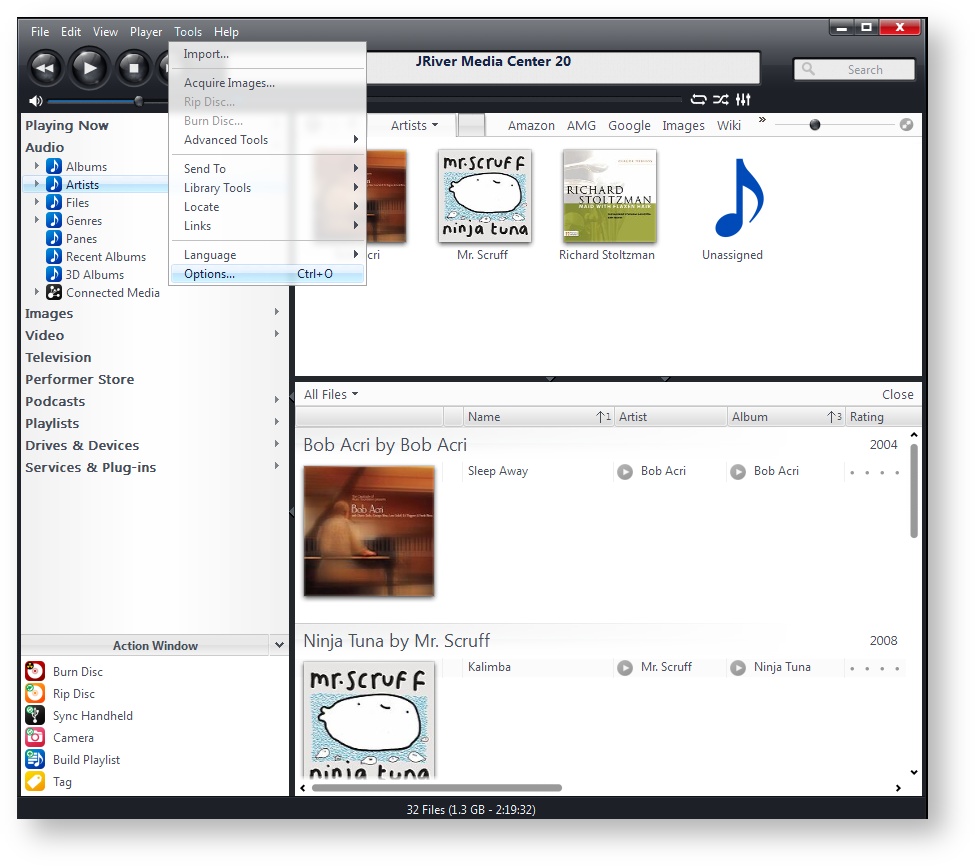
- Select General, then expand the Features menu and check the WDM Driver box.

- Windows will install a new audio driver.
Once finished, right click on the Speaker icon in the Windows Taskbar and select Playback devices.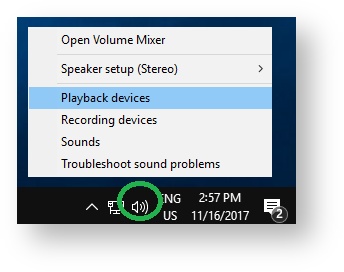
- You should now have a JRiver Media Center device, with a green checkmark showing it is the default device.
If it is not active, simply right click on it and select Set as Default Device.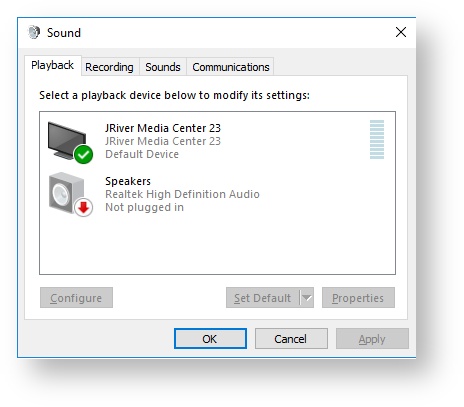
- By default, the JRiver Media Center WDM device will stop after 10 seconds of inactivity.
To have it enabled all time, go in JRiver File menu, and select Open Live.
On the source selection window, select WASAPI Loopback and press OK.
- Make sure your NADAC / NADAC Player Source is set to your computer name.
You can now use NADAC / NADAC Player with Windows sound.
Note: On the first playback, the Jriver will take a few seconds to initialize and you may experience a few drops.
For further details on JRiver WDM driver, please consult JRiver Wiki