BASIC MUSIC MISSION SETUP.
SetUp
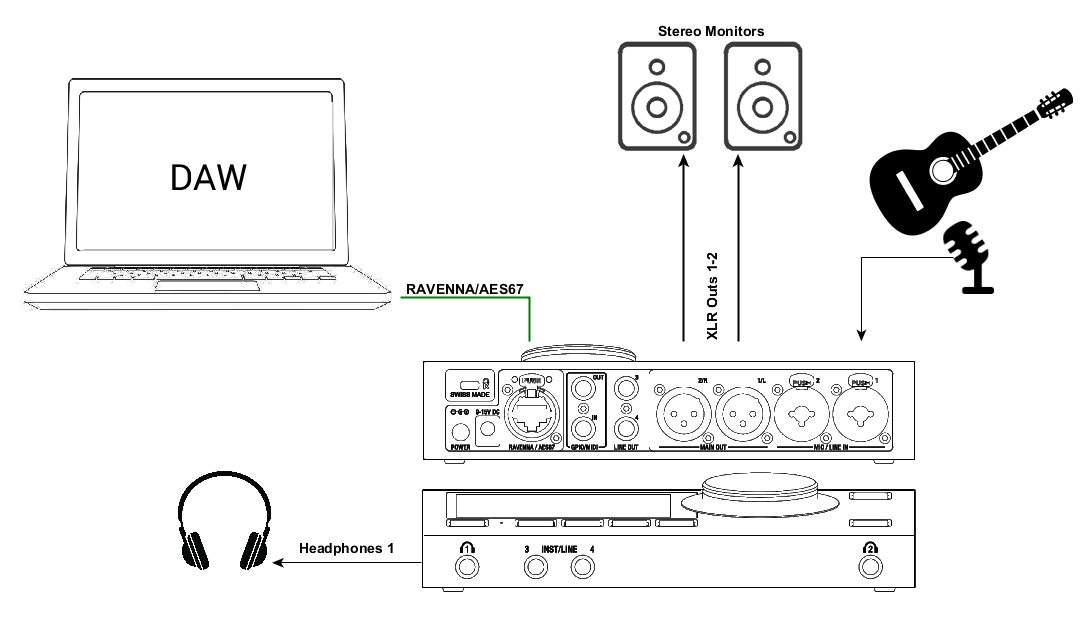
Using a Main Speaker Set and headphones in order to Monitor the DAW Main and instrument for playout or recording.
Prerequisites
First follow the the Drivers Installation Procedure and ensure that you have correctly connected and powered up your Anubis, and have selected and launched the Music Mission.
Connect your Active Monitors (or Power Amp) to the Anubis physical Outputs XLR 1 and 2 and/or TRS outputs 3-4 if you have alternate Monitors in your setup.
Then connect your microphone or instrument to one of the Anubis inputs.
Procedure
The Merging Audio Device (MAD – PC ) or Virtual Audio Device (VAD – Mac) must be installed
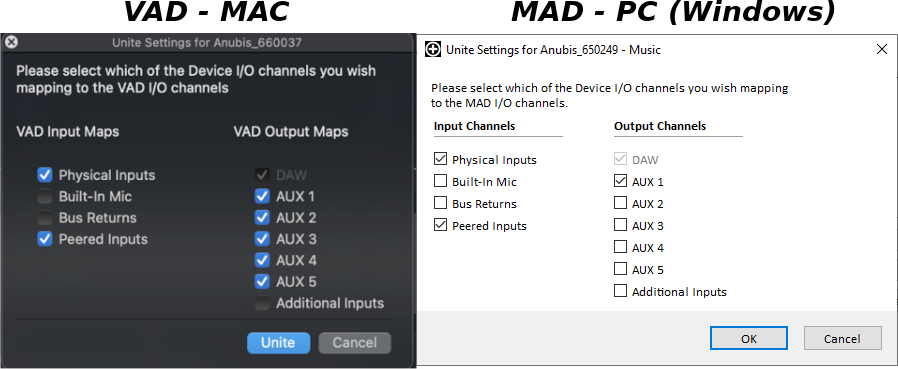
Open the VAD or MAD panel and select the UNITE tab.
Click on the discovered Anubis (Connect your Anubis to your Mac or PC using the RJ45 Cat 5e or Cat 6 cable (RJ45).)
If you have several network adapters, please select the one that your Anubis is connected to in the Network adapters section.Click Unite and select the elements you wish to connect.
Physical input: We check those in this setup example as we are going to be recording the Anubis inputs.
DAW: by default is always checked, select the number of AUX (Software Playback) you wish to use.
More details on UNITE and connectivity can be found on this page.Launch your DAW or Application, and configure it to use our Merging RAVENNA/AES67 Drivers.
Connect the audio outputs of your DAW or software to the DAW (1-2) or AUXES (3-4,..) outputs.
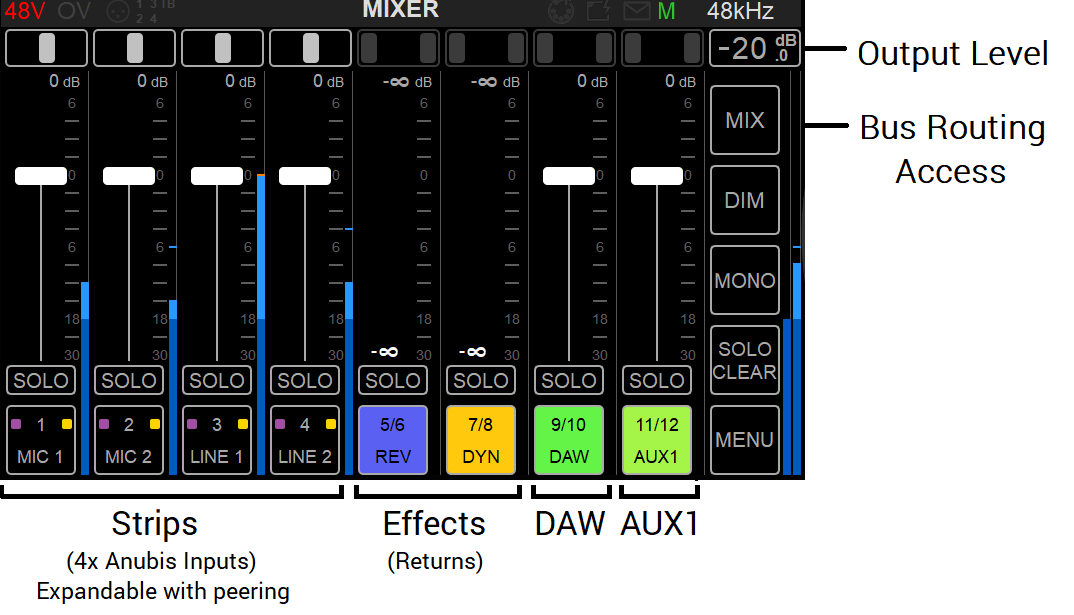
In the Anubis Mixer you should have signal coming in the DAW or AUXES (Software Playback)
Mixed with this signal are your direct Anubis inputs, if you have connected a Microphone or Instrument, you will be able to mix those with the Software Playback (DAW) output.
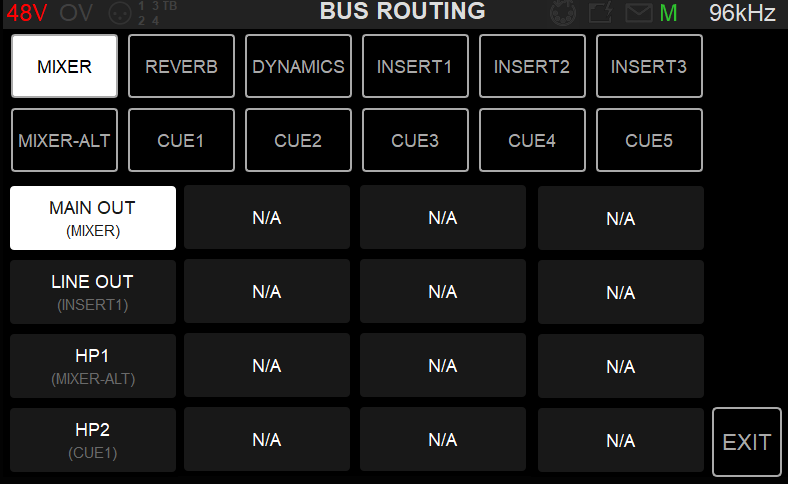
Open the Bus Routing Page and patch the Mixer and Mixer-ALT to the outputs you wish to monitor from.
You are ready to Record and Monitor Software applications (DAW) using the Anubis Music Mission in which you can now Mix the Anubis Inputs channels in ultra-low latency.


