This guide will explain how to setup your SG350 switch to use 2 VLANs.
Adding VLANs.
1x VLAN for the Ravenna AES67 and 1x VLAN for regular networking.
VLAN1 : will be used for regular networking.
VLAN2 : will be used for Ravenna AES67.
By default the switch already has VLAN1 created with defaults for regular networking.
So we will be adding VLAN2 for the for the Ravenna AES67 networking.
First step is to change the IP configuration to use a APIPA (Automatic Private Internet Protocol Addressing) type of IP.
The administration page will then be only accessed trough this new IP.
Putting this in an APIPA IP range (169.254.0.0/16) will ensure that you can always access its administration page.
Ravenna devices generally use APIPA IP range to communicate over the network.
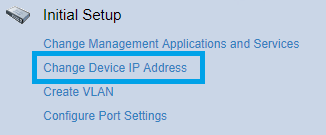
- In the Getting Started page, click on Change Device IP Adress
- Click on the Add button at the bottom of the IPv4 Interface Table.
- Set the IP Address type to Static IP Address.
Enter 169.254.1.254 in the IP Address field.
For the Mask setting, select Prefix Length and enter 16.
That will make your switch administration page respond to that IP address.
Note that we used Prefix Lenght instead of Network mask (16 is the same as 255.255.0.0).
But you could also set it to 255.255.0.0 it would also work. - Click on Apply to save the changes.
The switch will now change its IP address, therefore the 192.168.1.254 page you are actually using will stop responding. - The switch is now only accessible on HTTP://169.254.1.254
You will probably need to change to change your computer IP to "Obtain an IP address automatically" - Enter 169.254.1.254 in your browser, and enter your credentials.
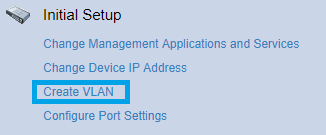
- In the Getting Started page, click on Create VLAN.
- Click on the Add button at the bottom of the VLAN Table.
- Set the VLAN ID: 2 and enter a VLAN NAME (can be anything you want).
Make sure VLAN Interface Status and Link Status SNMP Traps are both active.
Click on Apply once done.
Adding ports to the new VLAN2 we created in previous step.
VLANs
First we will examine how distribute ports across VLANs in the switch (how we are going to split the ports between vlans)
VLAN2 will use : PORTS 9 to 16 and 18 and 20
VLAN1 will keep: PORTS 1 to 8 and 17 and 19
You can set this as you wish but by default this is how we will configure the VLAN2.
- Go to "VLAN Management" and click on "PORT TO VLAN" on the menu, it will open the port to vlan pane on the right.
- Then select 2 in "VLAN ID equals to" and click on the "GO" button, it will open a new pane with VLAN2 config.
- As you can see by default all the ports for this VLAN are marked as excluded.
We want to change that to choose which ports we are going to use...
Check the following figure, representing what we want to do. - Now we are going to add the ports to our new vlan, for that change the Membership Type of the ports we want to add to VLAN2
from "EXCLUDED" to "UNTAGGED" as show in the picture bellow and click on "APPLY" to validate our changes. - Then click on the "COPY/SAVE CONFIGURATION" link to go save this configuration.
- Save the current configuration into your startup configuration so you don't lose any changes if the device is rebooted..
- Click "DONE" to finish, you might want to reboot your switch.
- After this is done if you check VLAN1 config you can see that all the ports from VLAN2 are now auto excluded from VLAN1.
- That is it, you now have VLAN1 and VLAN2 and they're traffic is independent from each other and your config should be like this:
This explains how to change ip for VLAN2 so the admin page of the switch can also be reached from VLAN2
- Go to "Administration" then click "Management Interface" and then "IPV4 Interface", the following pane will open in the right.
In Management VLAN choose 2 and on IP Adress type in the IP Adress you want.
I suggest you use the settings as shown in the picture bellow.Note
For VLAN2 appear on "Management VLAN" you will have to have something connected to it (at least one port in USE).
Save your settings, and reboot the device.
Here is how to change the IGMP settings to use for VLAN2 Ravenna AES67.
- Click on "MULTICAST" on the left menu.
- Click on "IPV4 Multicast Configuration" and then click on "IGMP SNOOPING".
- The following pane should show up in the right side.
Make sure "IGMP SNOOPING STATUS" & "IGMP QUERIER STATUS" are ticked "ENABLE" as show in the picture. - Select the "ENTRY 2" (vlan id 2) and click on "EDIT" as shown on the picture below.
- In the window that just popped up edit the entries there (all the yellow marked entries, should be set as shown) and click "APPLY"
- Click on Copy/Save Configuration link (yellow marked) to go save your configuration .
- Choose "Running Configuration" and "Startup Configuration" and click "Apply".
- Click on "DONE" button and that is it.
By default, Green Ethernet settings are applied, this needs to be disabled.
Please check your current configuration and set them to the same as show in this guide.- Port Management > Green Ethernet > Properties
Untick both Energy Detect Mode and Short Reach.
Untick 802.3 Energy Efficient Ethernet (IEEE)
By default, our config files use the Basic QoS Mode but the DSCP to Queue are settings modified.
Please check your current configuration and set them to the same as show in this guide.- QoS Mode: Basic MODE
- On the QoS Basic Mode / Global settings the Trust Mode should be : DSCP
- By default these are the DSCP to Queue settings, we will change that.
- Change the DSCP to Queue Settings as shown in the following picture and click apply to apply the new settings to the current running configuration :
- Once you click apply the following appears at the top of the DSCP to Queue window.
Click on the Copy/Save Configuration link to go directly to the save configuration page. - Save your settings from Running Configuration to Startup Configuration (click apply to save).
That will then apply the current settings to the start up configuration witch will be run every time the switch reboots.
In other terms that makes that configuration to become permanent.
- Go to "Administration" then click "Management Interface" and then "IPV4 Interface", the following pane will open in the right.


