/
SURROUND ANUBIS MONITORING WITH 3rd PARTY AES67 COMPLIANT INTERFACE.
SURROUND ANUBIS MONITORING WITH 3rd PARTY AES67 COMPLIANT INTERFACE.
SetUp
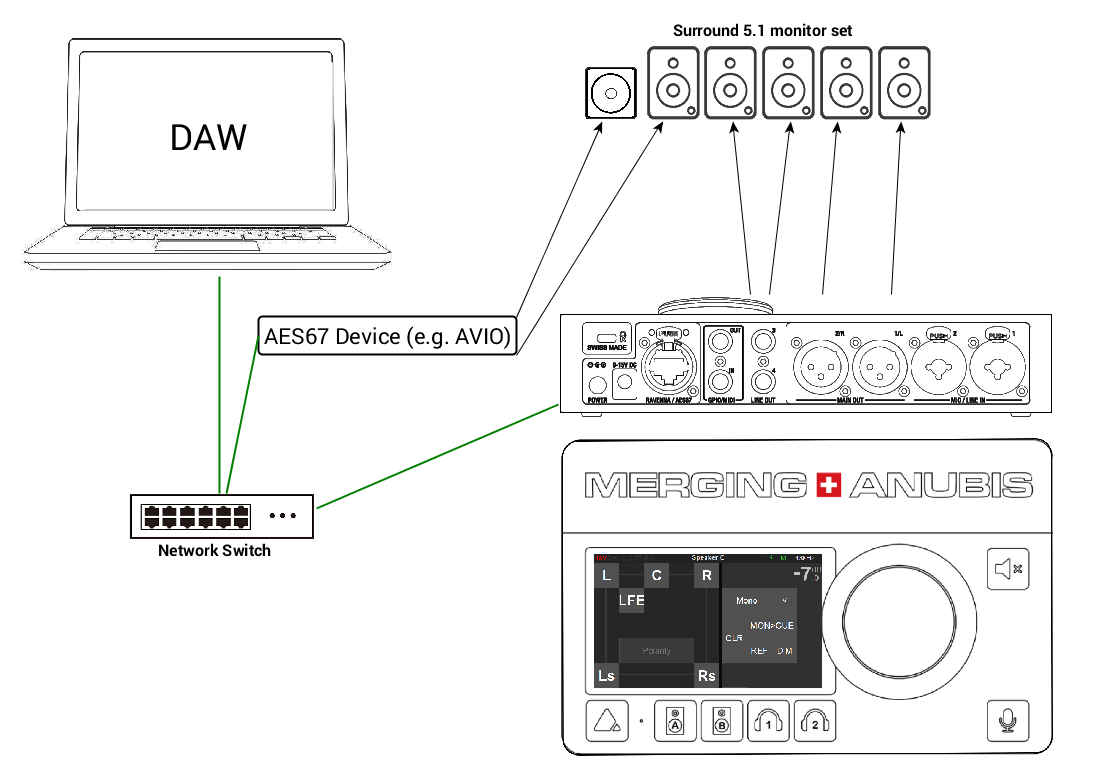
For users whom wishes to use Anubis as a surround Monitoring Controller, the example below details a 5.1 Monitoring Configuration, using a Dante-AES67 AVIO 2 x Channels Analogue Output interface.
Prerequisites
In addition to the Anubis, at least one AES67 compliant device, along with a RAVENNA/AES67 recommended network switch.
For Anubis, make sure you have followed the Drivers Installation procedure.
For the AES67 compliant device, refer to its manufacturer website for installation.
Procedure
- Connect the Dante/AES67 AVIO interface to the same network switch as your Anubis and Computer/DAW (running either VAD, Merging Audio Device, RAVENNA ASIO or MassCore)
Note: AVIO requires PoE, we recommend the use of the Cisco SG-350-10P - Install Dante Controller
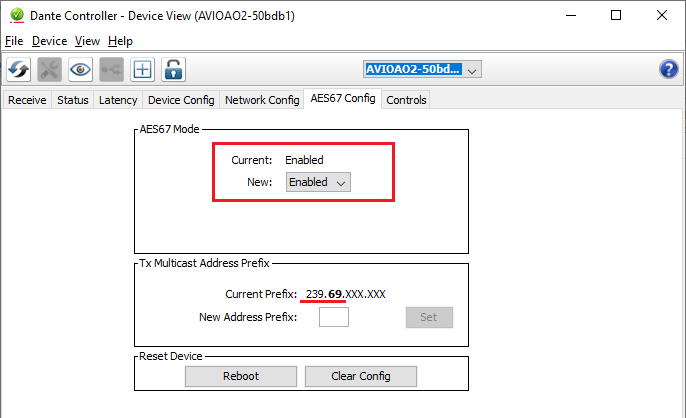
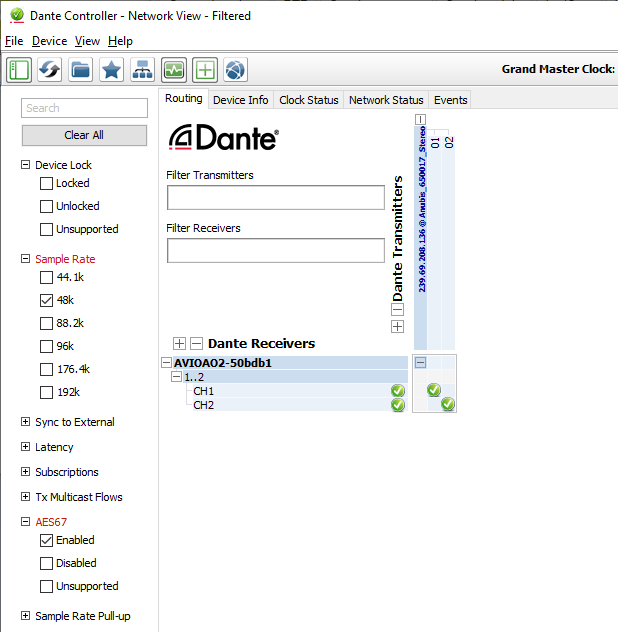
- Configure the Dante Controller to AES67 enabled mode.
Warning: The Dante-AES67 device in this case will be limited to 48kHz support this is so when in AES67 mode.
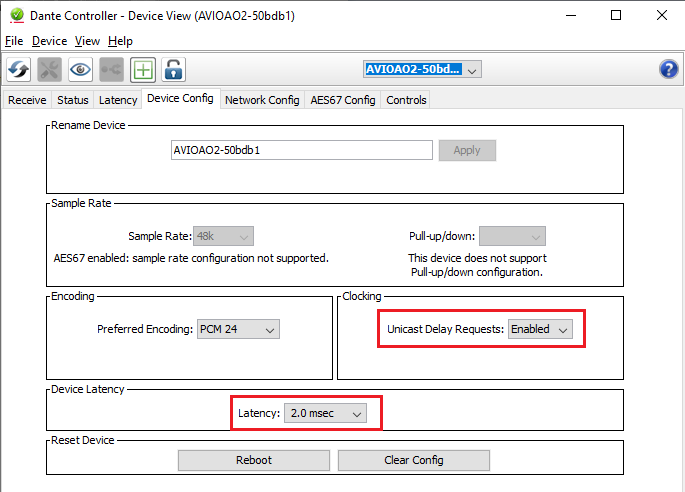
Then make sure that the Multicast Address Prefix is set to 239.69.xxx.xxx - In the Device Config Tab, set the Unicast delay to Enabled and latency to 2.0 msec.
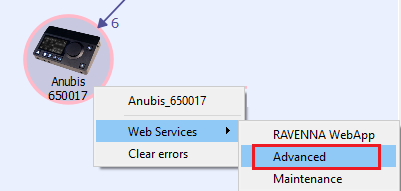
Note: In case of problems clear all the Dante logs and manually select the parameters form the Dante Controller settings. - Open the Anubis Advanced Pages (Mouse+Right Click on ANEMAN)
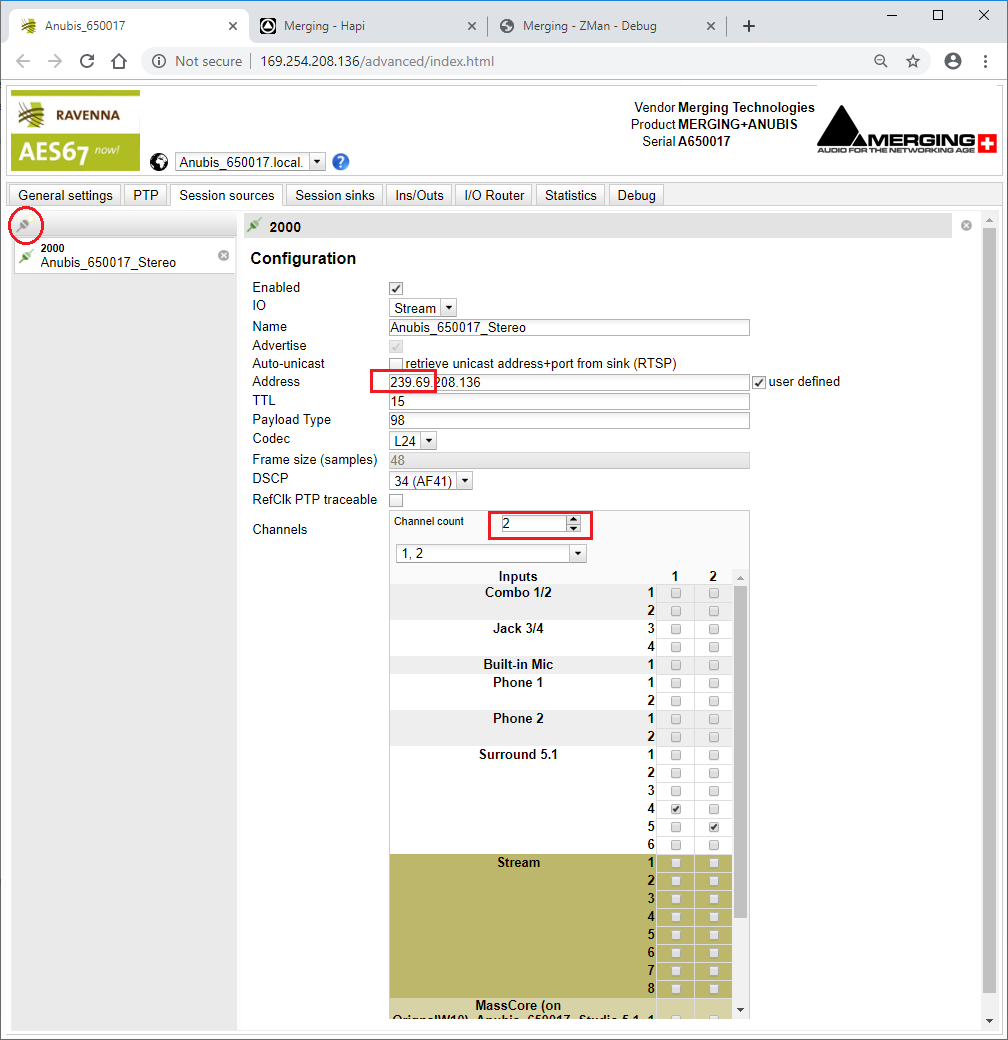
- In the RAVENNA Advanced Pages select the Source Tab.
Change the address to 239.69.xxx.xxx (the user defined checkbox will be automatically ticked)
Then create a New Stereo Source (channel count =2) - In the Dante Controller Matrix page connect the AVIO to the new Anubis Stereo Source.
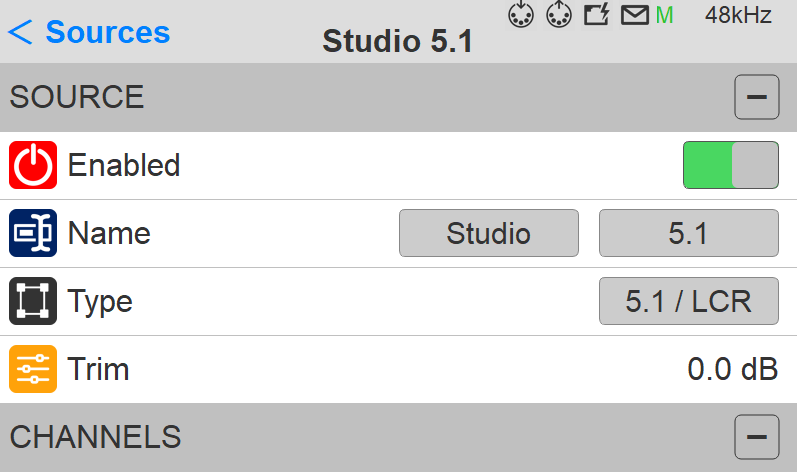
- Go to your Anubis under Settings>Sources and create a new 5.1 Source
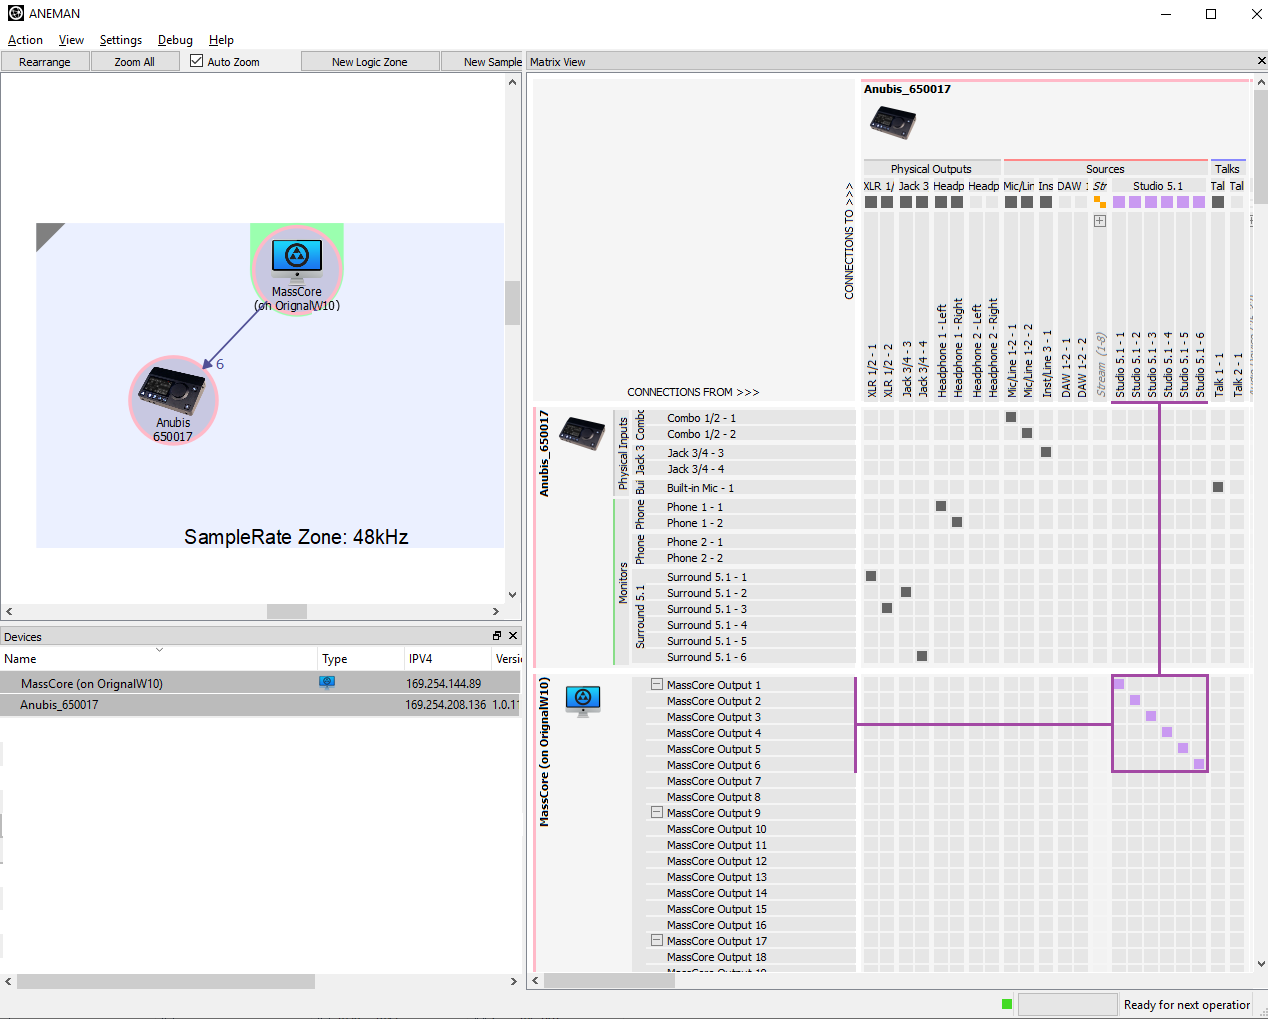
- In ANEMAN Connect this new source to the MassCore / RAVENNA ASIO / VAD outputs 1 to 6
- In your DAW, route your Output Bus to this new Source outputs (MassCore, ASIO/ MAD or VAD outputs).
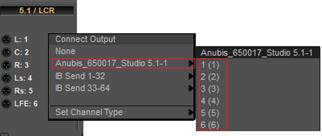
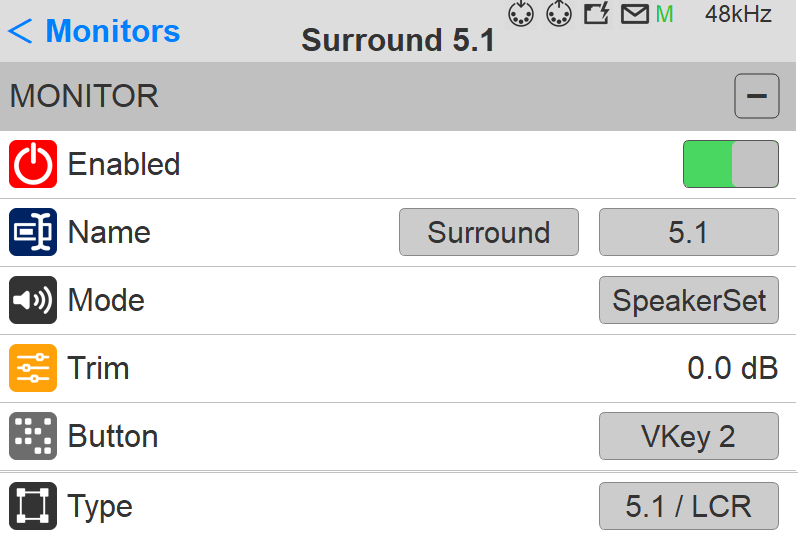
- In Anubis under Settings>Monitors create a 5.1 Speaker Set (or greater if you have an interface with more outputs available).
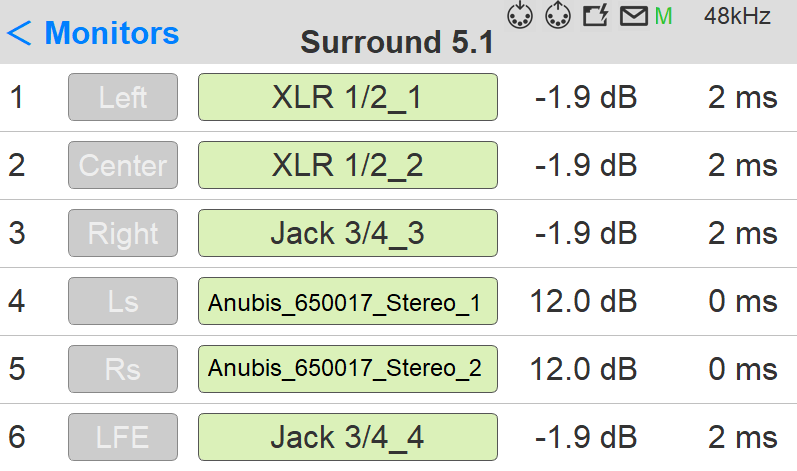
- In this example connect the Anubis 4 x Physical Output Channels (1-4) and then connect the Stereo Source pair of channels (AVIO - here connected on the Ls and Rs channels),
to the channels of your choice. - Calibrate the Channel levels and the Delay of the channels, in this example we’ve recorded the outputs with a Hapi AD8 module.
But you could do the delay and level alignment by recording one Anubis Output Channel along with one of the AVIO interface output channel. - On the Anubis Main monitor pages, select your 5.1 Source.
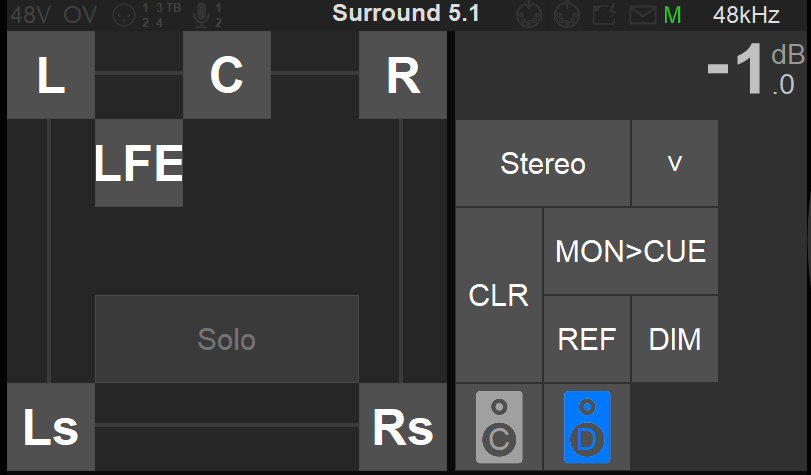
Then select your 5.1 Speaker set (in this example, on Vkey 2 / D)
You should now have full control over your AES67 Surround 5.1 Speaker set using the Anubis Monitor Mission.
Notes :
Additional guide to configure Merging and 3rd party AES67 devices.
Merging RAVENNA Advanced Pages user guide.
, multiple selections available,
Related content
Anubis Use Cases.
Anubis Use Cases.
Read with this
PEERING with Merging+Anubis
PEERING with Merging+Anubis
More like this
ANUBIS Room Correction with SONARWORKS SOUNDID REFERENCE.
ANUBIS Room Correction with SONARWORKS SOUNDID REFERENCE.
Read with this
MASTERING ANUBIS & DAW SETUP.
MASTERING ANUBIS & DAW SETUP.
Read with this
RECORDING SETUP (Monitoring Mission).
RECORDING SETUP (Monitoring Mission).
Read with this
Dante devices Multicast Groups configuration - Cisco switches.
Dante devices Multicast Groups configuration - Cisco switches.
More like this
