MAD: How to run multiple applications using Muti-ASIO clients and as well monitor your system sound.
SetUp
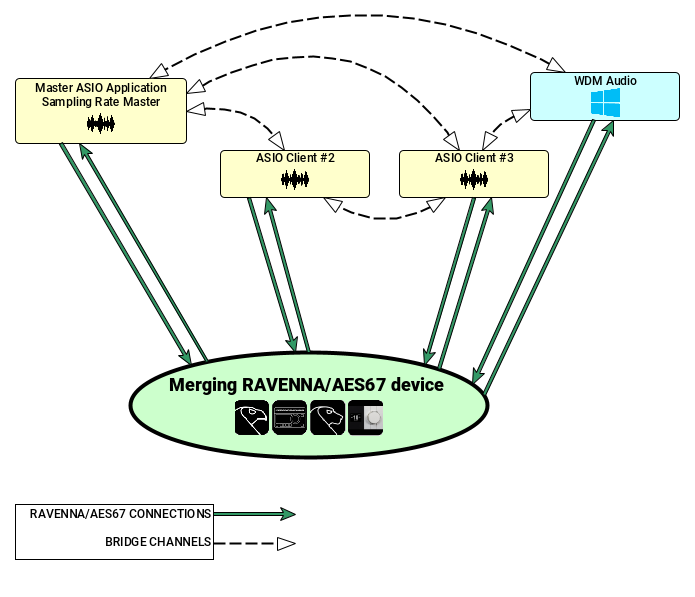
Using MAD ASIO Multi-client and WDM bridge capabilities
Prerequisites
The Merging Audio Device Driver installed and configured (as described in the MAD Installation page)
A Merging RAVENNA/AES67 device connected to your computer.
Procedure
- Configuring your ASIO DAWs to run with Merging Audio Device driver
Start your DAWs, and set the Merging Audio Device driver as ASIO interface.
Refer to the manufacturer documentation for such configuration.
WDM Audio can be configured in Windows settings > System > Sound
Note : Depending on your requirements, you may set a Master ASIO Host (aka sampling rate master application).
You can set a specific DAW or use Merging Audio Device if you wish to set the sampling rate from the MAD Panel.
Please refer to this page for more details on sampling rate configuration with the Merging Audio Device driver - Use several audio applications on the same hardware inputs and outputs
If you want to have all your applications audio on the same hardware inputs - outputs, the Merging Audio Device driver can sum those.
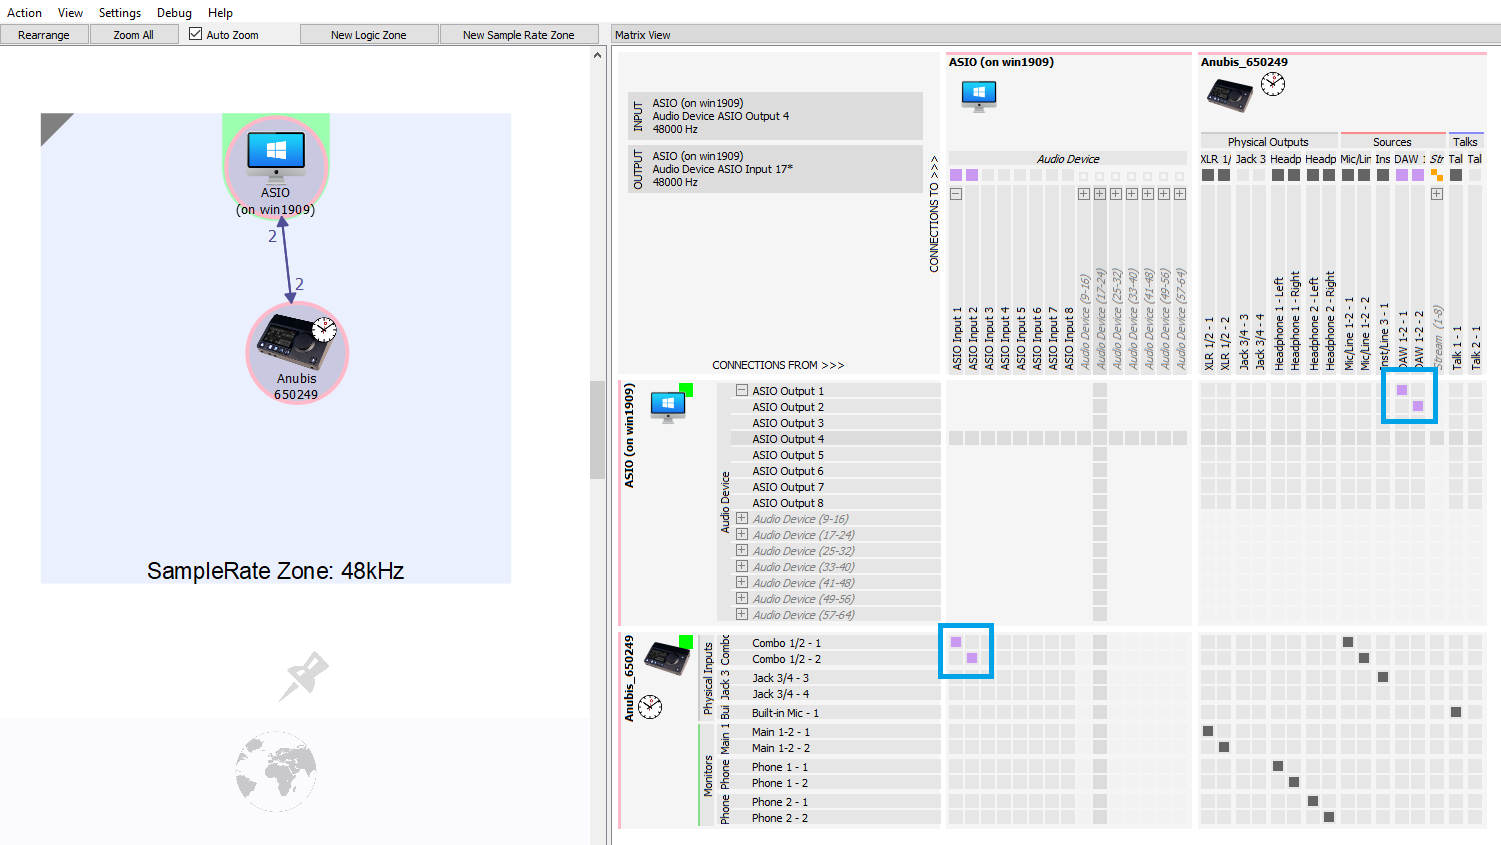
In this example, we will use 2 inputs and 2 outputs with an Anubis device, same procedure applies if you need more channels or use another Merging hardware device.
Start Aneman and connect the required inputs and outputs.
Note : If you don't use a managed switch, especially configured for RAVENNA / AES67 network, please use Unicast connections to avoid network issue.
You can now set your DAW to ASIO inputs 1-2 and outputs 1-2.
For WDM Audio, open the Merging Audio Device panel - WDM Settings section, and make sure the inputs and/or outputs map is set to 1-2. - Use several audio applications on the separate hardware outputs
If you want each of your DAW to have its dedicated hardware ouputs (or inputs).
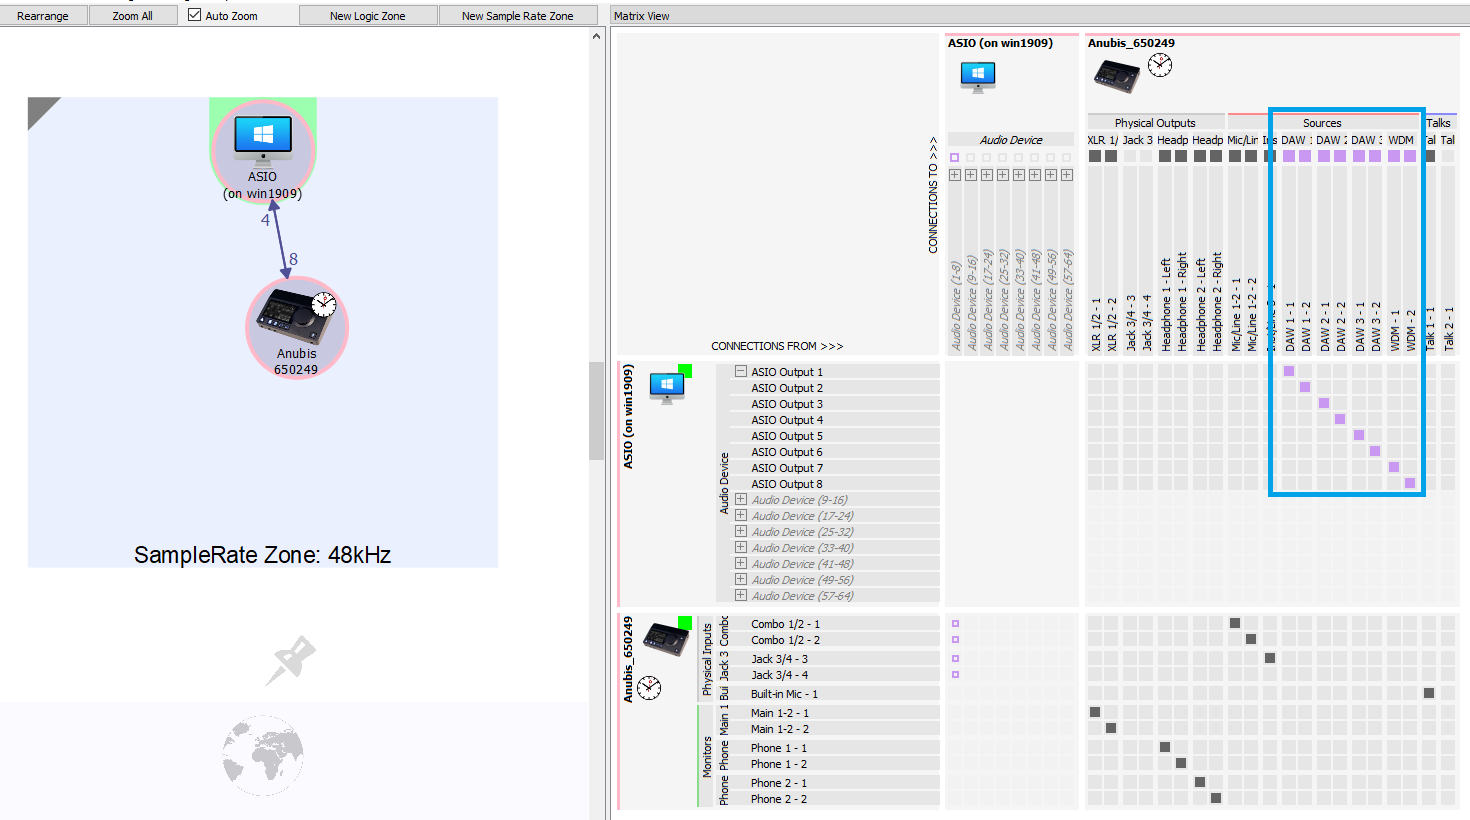
In this example, we will use 3 DAWs and Windows Audio with an Anubis device (same procedure applies if you need more channels or use another Merging hardware device.)
In Anubis, create 4 Stereo Sources (as described in Anubis - Create Source Tutorial).
Start Aneman and connect the 4 Stereo sources to the 8 ASIO ouputs.
In your first DAW, route the output to ASIO 1-2 ; in the second DAW, route to ASIO 3-4 and in the third one, route to ASIO 5-6.
For WDM routing, go in Merging Audio Device panel - WDM Settings section and set the outputs maps to 7-8.
Your DAW outputs are now routed to separate hardware outputs.
Tip : With Anubis Monitoring mission features, you can easily sum or switch between DAWs outputs. See Anubis User Manual for details.
Note for Horus - Hapi users : Horus and Hapi do not support multiple stereo connections, please use 8 channels connections, especially for high sampling rates. - Use bridge channels between audio applications.
If you want to route the audio between your DAW.
In this example, we will use 2 DAWs and Windows Audio with an Anubis device (same procedure applies if you need more channels or use another Merging hardware device.)
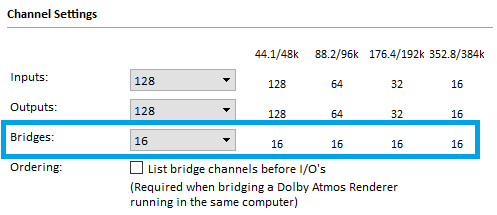
Go in Merging Audio Device panel - Channel Settings section and set the required number of Bridge channels.
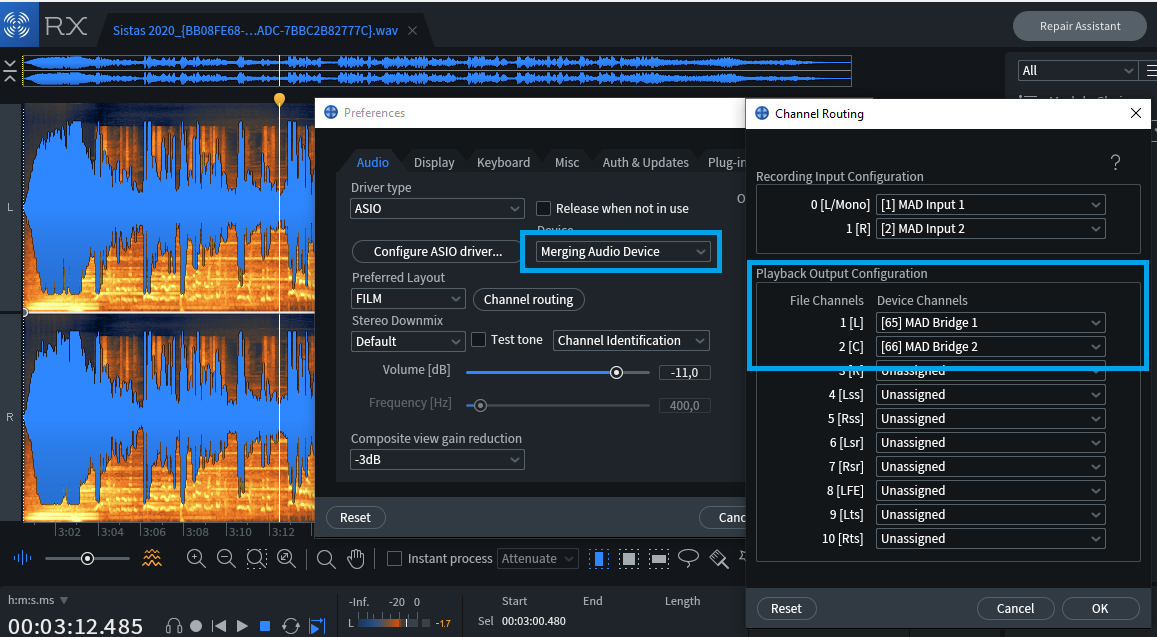
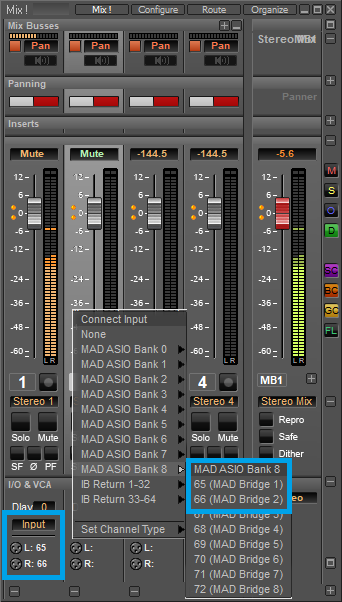
In your Primary DAW, set the inputs to MAD Bridge 1-2, and in your Secondary DAW, set the outputs to MAD Bridge 1-2.
See this example with Izotope RX routed to Pyramix.
Note : Take extra care when routing both MAD Bridge inputs and outputs channels between applications to avoid loop feedback !
Notes :
- Remember that for higher sampling rates, the number of channels is reduced (see the number of channels per sampling rate in the MAD Panel - Channel Settings section).
Therefore, make sure you have mapped the WDM channels to available ASIO channels (eg. WDM mapped to 9-10 won't work if you only have 8 ASIO outputs available). - WDM Audio is currently not available for DSD sampling rates
- Some Windows Audio applications can't run higher than 192 Khz or may not be compatible with multi-channels outputs above stereo.
See this page for details
