Cisco SG300-10 SG300-20 Auto-configuration
- David Jacques
- Florian Baume
- Jordi Torres (Unlicensed)

General Info.
This is in no case an exhaustive configuration procedure, It's a simple guide on how to configure these switches to use them with Ravenna/AES67 networks.
Before Starting
Important! If you have problems accessing the switch for configuration when connected to the Merging MassCore PCIe Ethernet card (NET-MSC-GBEX1) please connect it to the PC’s on-board Ethernet port. When configuration is completed reconnect the switch to the MassCore Ethernet card.
Connecting several Cisco switches together requires additional configuration.
Please also see the Multiple network switches considerations page and Cisco SG300/350 Multiple switches configuration guide.
Dante devices requires an additional configuration, not included in the configuration files.
See the Dante devices Multicast Group configuration page for details
Cisco SG300 Switch Auto-configuration Procedure
Note: For Cisco SG300 Switches other than the SG300-10 and SG300-20 please use the manual configuration procedure.
- Right click on the Network icon in the Windows Taskbar.

Select: Open Network and Sharing Center
Click on: Change Adapter Settings on the left of the pane.
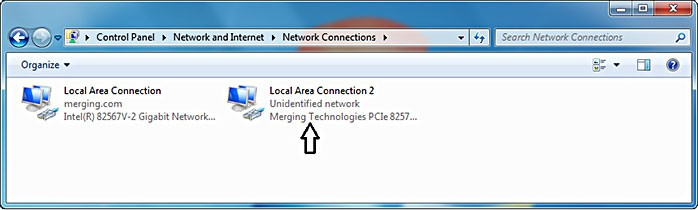
Right-click the Merging Technologies PCIe 8257 RAVENNA Network Card and select Properties:
(same procedure applies with any other network adapter)
Select Internet Protocol Version 4 (TCP/IP) and Click on Properties:

Click on the Use the following IP address: radio button and enter 192.168.1.2 (the Cisco SG300 switch has a factory default IP address of 192.168.1.254).
Click on the OK button to accept the settings and close the dialog.
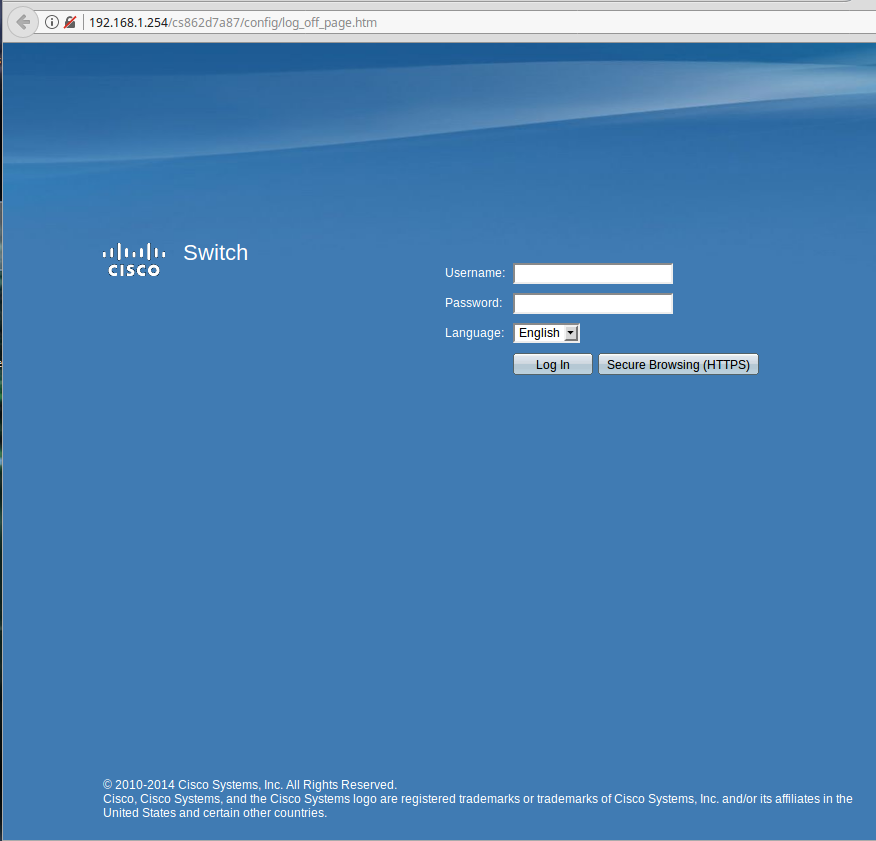
Open a browser and type 192.168.1.254 in the address bar, username: "cisco" password: "cisco", Click on the Log in button .
After the login prompt, you will be asked to change that default password to whatever you want.
It is a required step and the first one into securing you're router/switch, it is also a one time step only.
After the default is changed, if you wish to change it again you will have to do that in the Administration page.
Reseting the switch to "factory defaults" will also ask you to do this step again.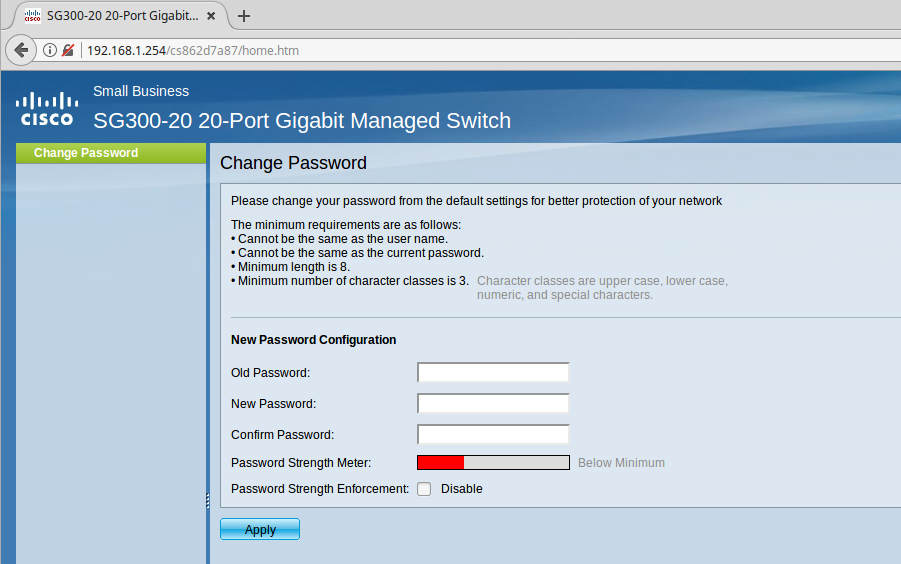
The Administration page will now load and you can start configuring your switch.

Download the latest configuration file for your Cisco SG300 switch model :
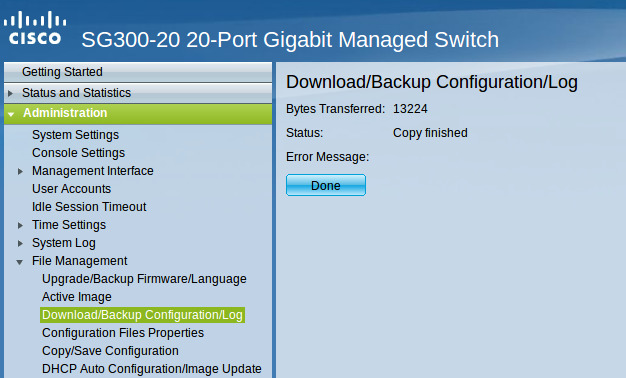
Go into "Administration" then click "File Management" to expand, then click "Download/Backup Configuration" to open its pane.
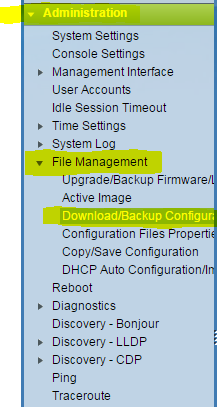
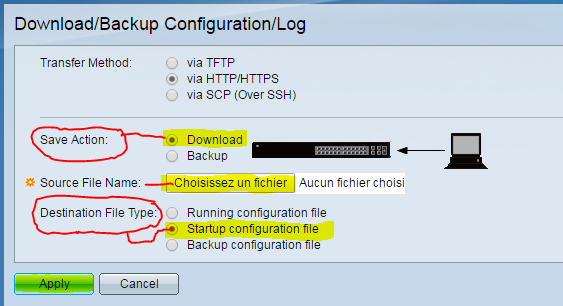
In there in the "Save Action" click on "Download" (its chosen by default).
Then on "Destination File Type" choose "STARTUP CONFIGURATION FILE"
Then click on BROWSE and a new window will pop up.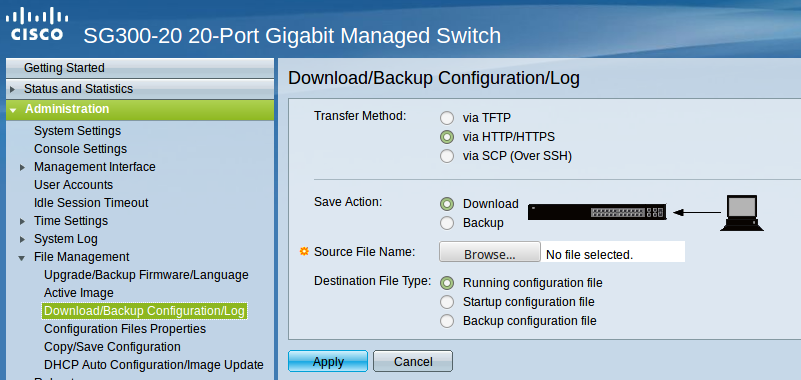
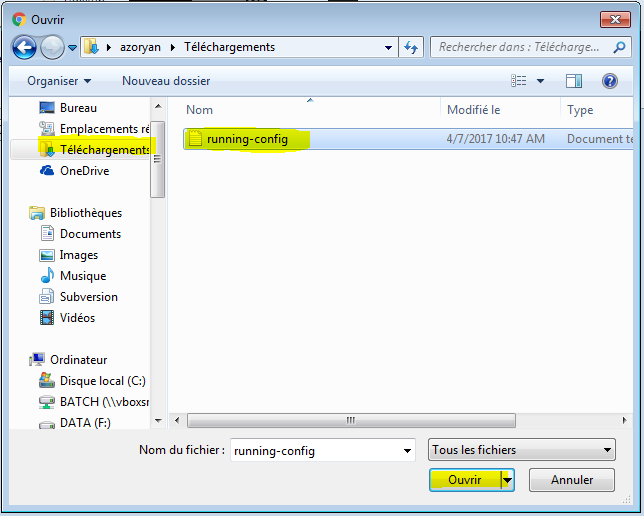
In the browse window, point to the downloaded configuration file location, select it and click "open"
Then click"Apply" for it to load your configuration file into the STARTUP CONFIG.
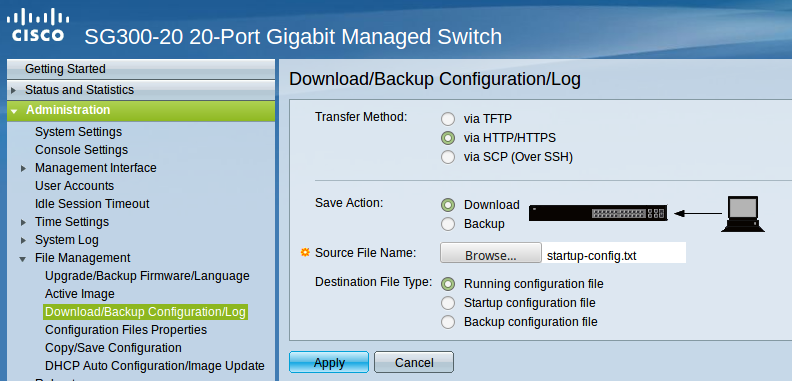
Click "Done" to complete the procedure.
- You must now restart the switch for the changes to apply.
Click Administration > Reboot
Select Immediate and click on Reboot button.
Note that the device might take some time to reboot.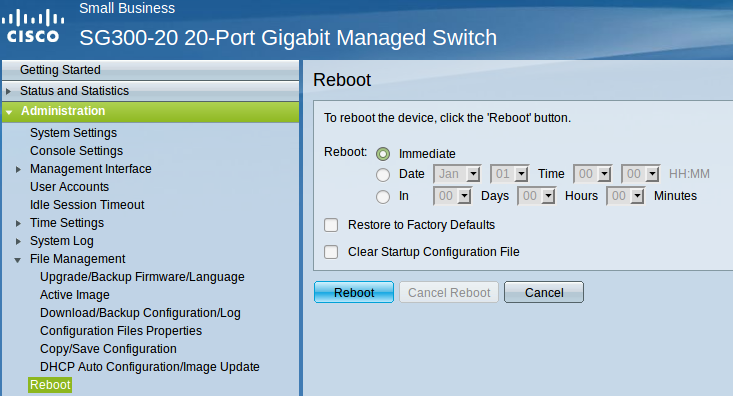
- In the Network Connections window (see steps 3. 4. and 5. above), right-click the Merging Technologies PCIe 8257 RAVENNA Network Card and select Properties.
Select the Obtain an IP address automatically radio button and also select Obtain DNS server address automatically, click on OK.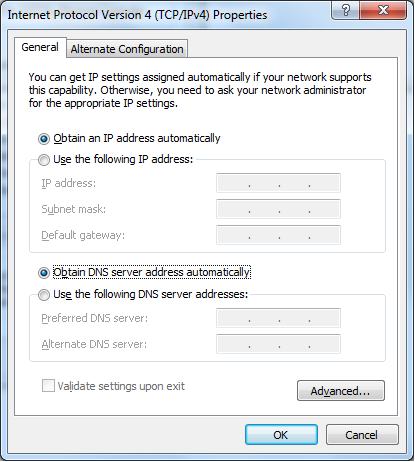
- The switch is now configured and ready to use, and the Merging RAVENNA Network Card should have auto-configured itself with an IP in the 169.254.x.x range.
You can verify this by opening a browser and typing 169.254.1.254 in the address bar, and log in.