2. SG-350 - Single VLAN configuration
- David Jacques
First step is to change the IP configuration to use a APIPA (Automatic Private Internet Protocol Addressing) type of IP.
The administration page will then be only accessed trough this new IP.
Putting this in an APIPA IP range (169.254.0.0/16) will ensure that you can always access its administration page.
Ravenna devices generally use APIPA IP range to communicate over the network.
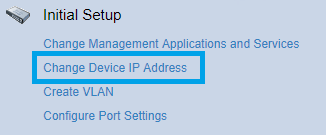
- In the Getting Started page, click on Change Device IP Adress
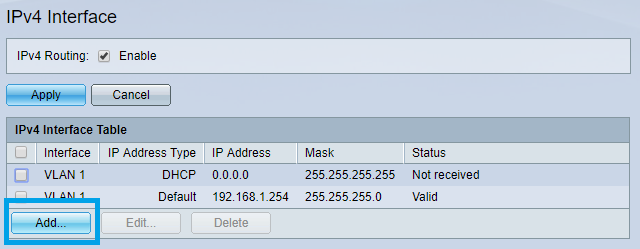
- Click on the Add button at the bottom of the IPv4 Interface Table.
- Set the IP Address type to Static IP Address.
Enter 169.254.1.254 in the IP Address field.
For the Mask setting, select Prefix Length and enter 16.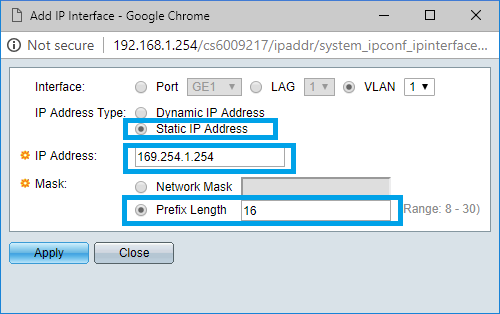
That will make your switch administration page respond to that IP address.
Note that we used Prefix Lenght instead of Network mask (16 is the same as 255.255.0.0).
But you could also set it to 255.255.0.0 it would also work. - Click on Apply to save the changes.
- The switch will now change its IP address, therefore the 192.168.1.254 page you are actually using will stop responding.
- The switch is now only accessible on HTTP://169.254.1.254
You will probably need to change to change your computer IP to "Obtain an IP address automatically" - Enter 169.254.1.254 in your browser, and enter your credentials.
- On the left pane menu, click on MULTICAST.
Then click on IPV4 Multicast Configuration to expand it.
Click now on IGMP SNOOPING.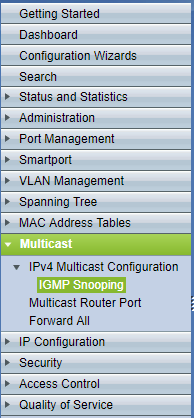
- In the IGMP Snooping page, enable both the IGMP Snooping Status and IGMP Querier Status checkboxes.
Then click on on Apply.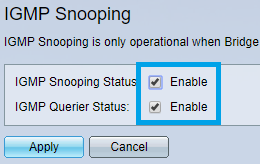
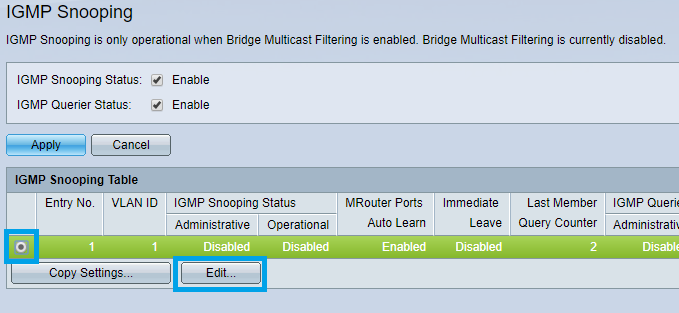
- On the IGMP Snooping Table, click on the radio button to select and then click on Edit.
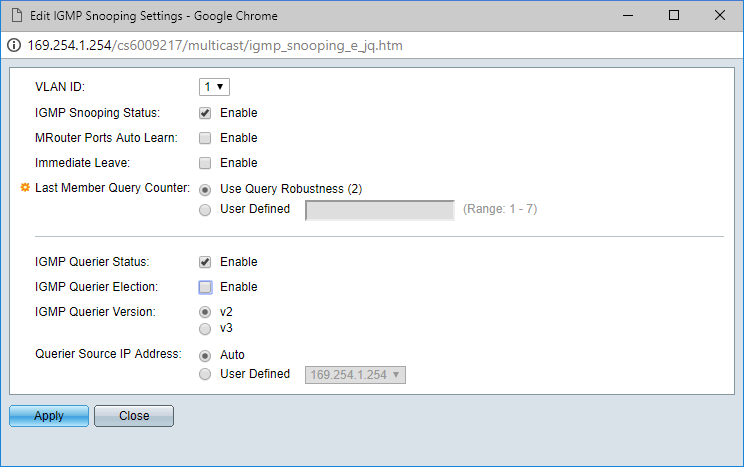
- Configure the IGMP Snooping Settings as on the picture below, and click Apply once done.
By default, Green Ethernet settings are applied, this needs to be disabled.
Please browse to Port Management > Green Ethernet > Properties
Untick both Energy Detect Mode and Short Reach, and untick 802.3 Energy Efficient Ethernet (IEEE) as well.
Click on Apply once done.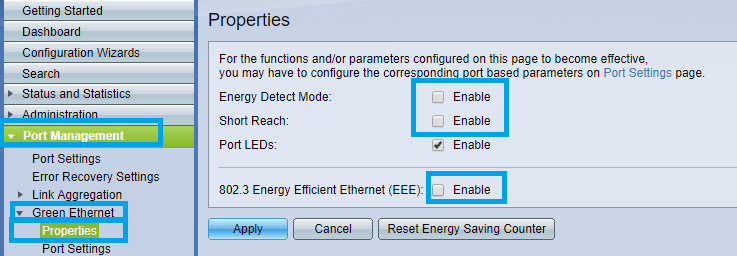
Browse now to Quality of Service > General > QoS Properties.
The QoS Mode should be set to Basic.
Click on Apply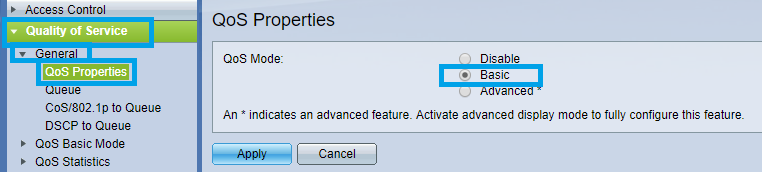
- Go now in Quality of Service > QoS Basic Mode > Global settings.
The Trust Mode should be set to DSCP
Click on Apply.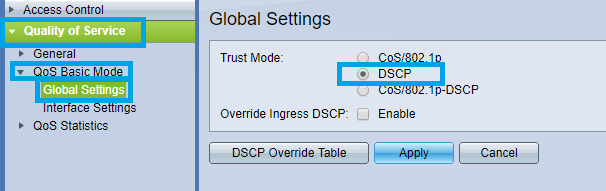
- Go back to Quality of Service > General, then DSCP to Queue.
Change the DSCP to Queue Settings as shown in the following picture and click Apply once done.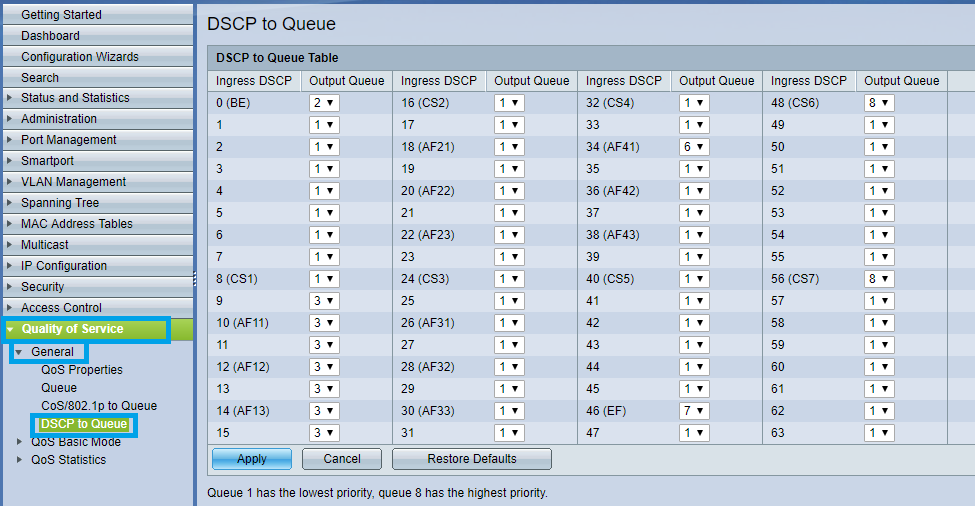
Note : Queue 34 : RTP AES67 / Queue 46 : PTP AES67 / RTP Ravenna / Queue 48 : PTP Ravenna / Queue 56 : PTP Dante Now is a good time to save the configuration.
Go in Administration > File Management > File Operations.
Select Duplicate as Operation Type.
Source File Name : Running Configuration
Destination File Name : Startup Configuration
Click on Apply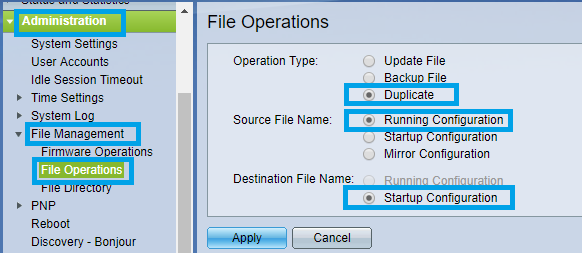
This will apply the current settings to the start up configuration.
In other terms that makes that configuration to be permanent (unless a reset of the device is done).You must now restart the switch for the changes to apply.
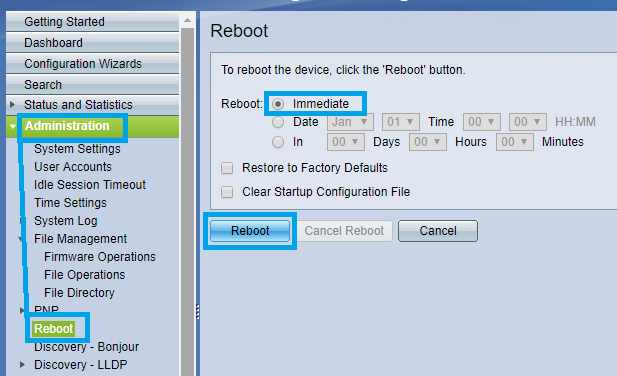
Click Administration > Reboot
Select Immediate and click on Reboot button.
Note that the device might take some time to reboot.