Ovation MIDI remote control configuration
- David Jacques
To be properly detected, your MIDI device needs to be plugged in before starting Ovation.
To use the Horus or Hapi MIDI DIN, see this page.
Fire, Pause or Stop specific Cues using General MIDI.
Ovation settings
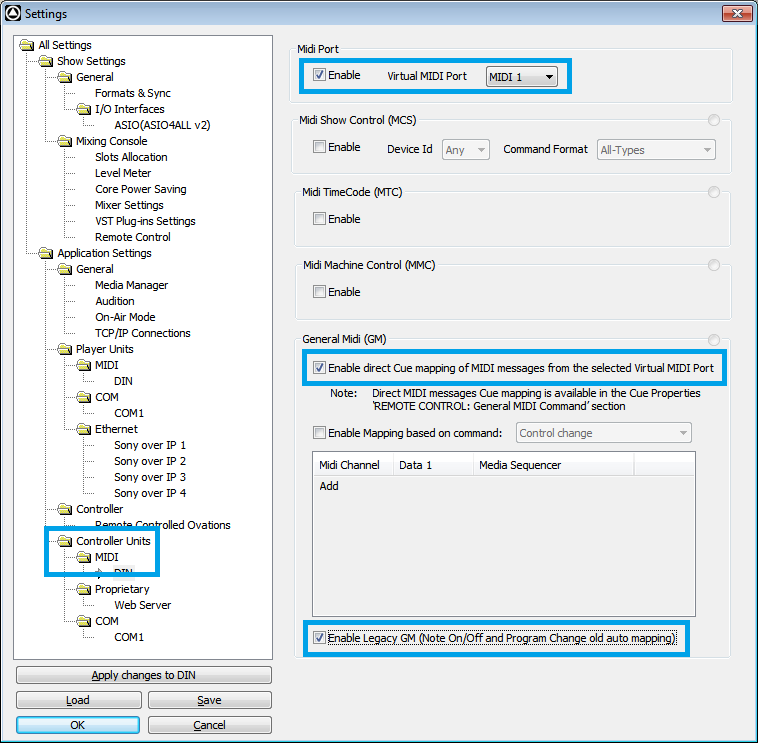
Go in Ovation Settings > Controller Units > MIDI
Select your MIDI interface, enable it and assign a Virtual Midi Port to it.
Enable the Direct Cue mapping option, to allow direct cue control.
Enable Legacy GM option, for automatic MIDI message mapping.
Click on OK to apply and close the settings.
Cue Mapping
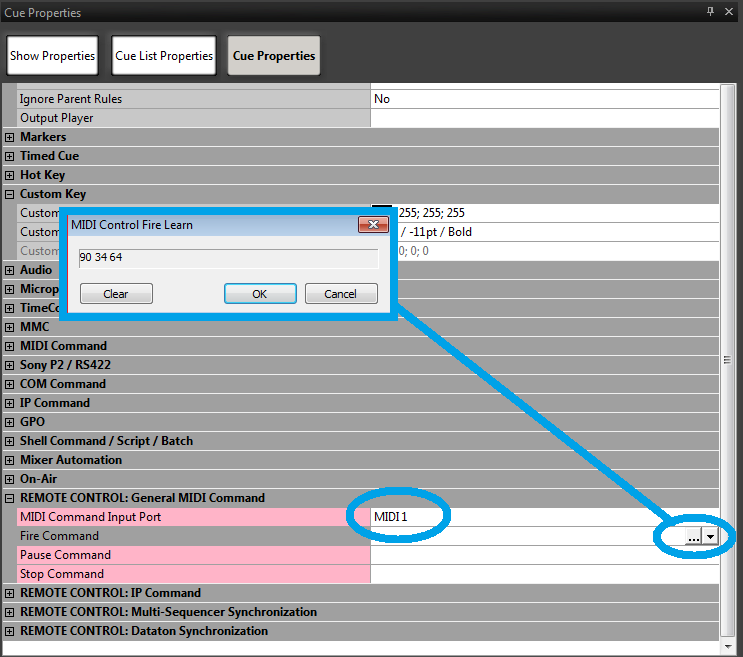
Select the Cue you want to control, and access its Cue properties.
Browse to REMOTE CONTROL General MIDI Command.
Set your MIDI input port (= MIDI Virtual port number configured in the Settings)
You an enter a specific MIDI message (in Hexadecimal) directly in Fire, Pause and Stop Command.
Or click on the … icon, to open the MIDI learn window, which displays incoming MIDI Commands.
Send your MIDI command and, when you see it in the field, click on OK to complete the mapping.
Ovation Commands mapping using General MIDI.
Many Ovation commands can only be mapped with General MIDI messages.
Lists of Ovation mappable MIDI commands can be found in Ovation UM - Appendix III : http://www.merging.com/downloads#ovation
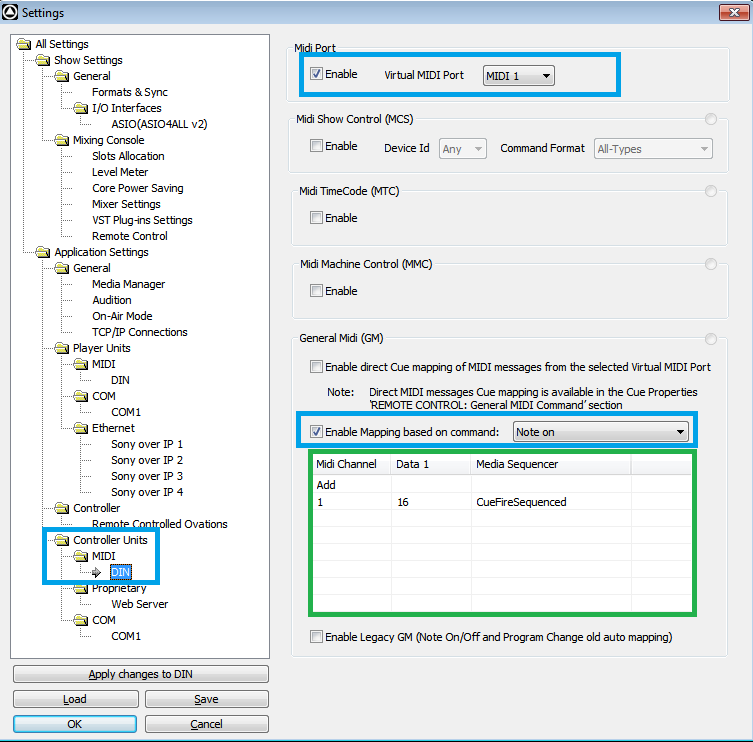
Ovation settings
Go in Ovation Settings > Controller Units > MIDI
Select your MIDI interface, enable it and assign a Virtual Midi Port to it.
Enable the “Enable Mapping based on command” option, and select the type of command you want to use (Note, Program or Control change,...)
Command mapping
In the mapping section, click on Add to map a command.
Enter the Midi Channel, select the required command from Media Sequencer drop down menu.
Now select the MIDI data that will trigger the command (0-63). This value is in decimal, not hexadecimal.
In the example below, CueFireSequenced is mapped on a MIDI keyboard, using Note on, triggered when pressing a specific note.